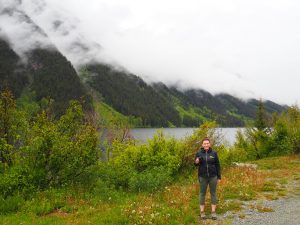
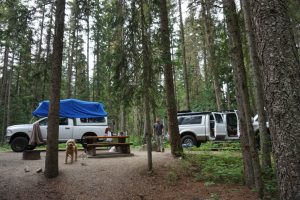
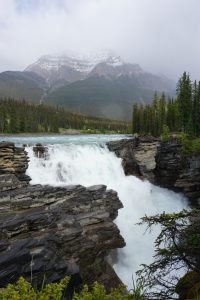
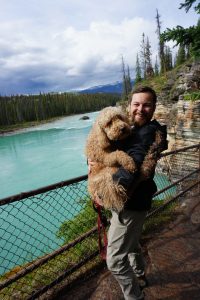
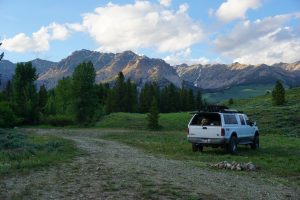
Our 2 country, 8 state, 5,084 Mile Road Trip

Reality was a hard hit after being (mostly) off the grid for two weeks while we road tripped through the US and Canada. There’s just something about returning from vacation that’s never fun, ya know?

Minus some not-so-minor transmission issues in the truck, our trip went pretty well. I thought I’d do a brief recap of the ground we covered (Instagram posts just don’t do it justice!). Check out some highlights and fun facts about our trip below.


By the numbers:

Miles traveled: 5,084

Fuel stops: 16

Coffees consumed (by 4 people): 66

Breweries visited: 10

Laundry stops: 3 (it was supposed to be 2, but somehow EVERY dryer in Butte, Montana was broken)

Hitchhikers spotted: 9 (plus one dog)

National Parks visited: 7

Bears spotted: 2 (one grizzly and one black bear!)

Days of rain: 11

Nights spent camping: 14 (no hotels for this crew!)

Cheapest fuel: $2.99/gallon of diesel in Salt Lake City, Utah

Most expensive fuel: we estimated a gallon of diesel was close to $6.00 USD in Canada…outside of Canada, the most expensive fuel was in California ($3.79/gallon).


Day 1

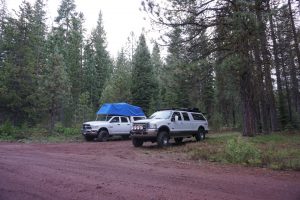
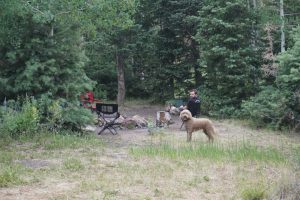
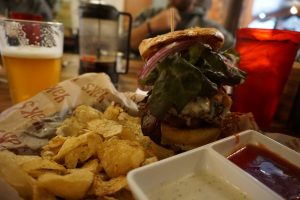
We hit the road at 4:00 AM after three (yes, 3) hours of sleep. We drove from Thousand Oaks to just south of Crater Lake National Park in about 16 hours (including stops). The highlight of the day was our stop at Yaks on the 5 for some epic burgers. We camped at a dispersed site off the Volcanic Legacy Scenic Byway. Not sure we could find this site again if we tried, but it was beautiful while we were there!
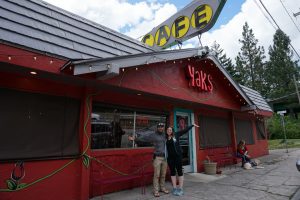
Posing outside of Yaks Cafe.
YAKS!
The giant burger from Yaks.
Yeah…it was one of those kinds of burgers!
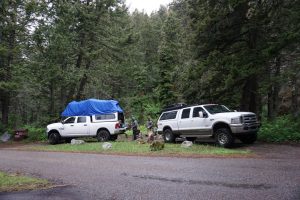
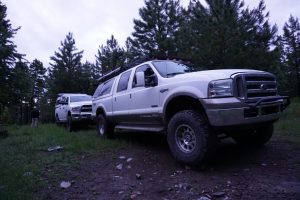
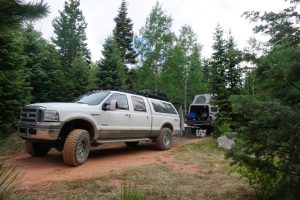
Two trucks parked in the forest.
Our first night of camping. It was so cold it started to snow at one point!
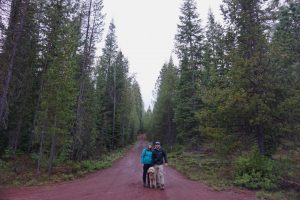
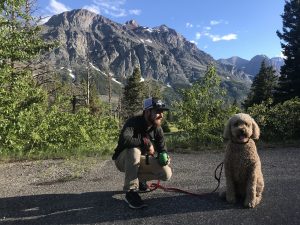
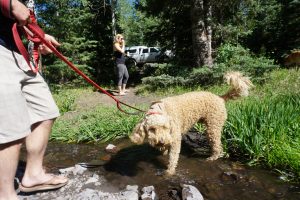
Posing with the dog during a walk in the forest.
Somewhere in the middle of the forest…
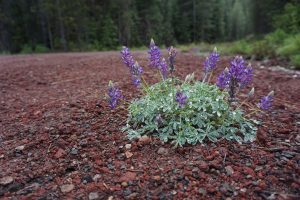
A little purple and green bush growing in the road.
The prettiest little plant I found in the middle of the forest road. Turns out these purple sprays are all over Oregon!

Day 2

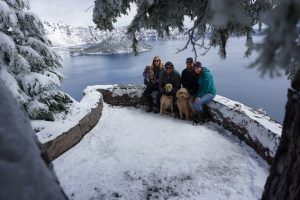
After some awesome breakfast and a run for the dogs, we hit Crater Lake National Park, and were lucky enough to see the lake despite snowy conditions. Then we hit the road and headed north up the Cascade Lakes Oregon Scenic Byway to Bend. It was a beautiful drive with views of lava flows and Mt. Bachelor. We made our first brewery stop at Immersion Brewing in Bend upon arrival before continuing on to our (very rainy) campsite at the Oregon/Washington border. This was our first night cooking in the rain, and one of the main reasons we chose to eat out in lieu of cooking in the rain on future nights. 3 dogs, 4 humans, and a skottle grill don’t easily fit under a small awning.
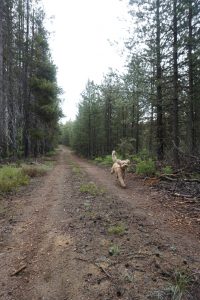
Oakley the goldendoodle running through the forest.
This place was heaven on earth for Oakley!
Four adults and three dogs sitting with Crater Lake in the background.
We got lucky with a clear day at Crater Lake.
Tucker and Oakley in the truck before the start of a scenic drive.
The start of our scenic drive, with a brief period of clear skies!
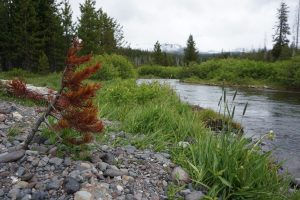
A stream with mountains in the background.
Back to clouds and some rain, but a beautiful view nonetheless.
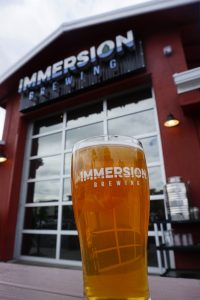
A glass of beer with Immersion Brewing in the background.
The best beer we had all day! It was our first brewery stop, and we had the River Rider Northwest IPA. It hit the spot.
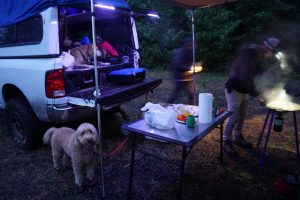
Tucker cooking under an awning in the rain.
Cooking in the rain. Easier said than done.
A view of the forest where we camped.
Bird’s Eye View of our campsite for night number 2.

Day 3

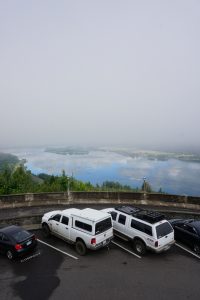
Multnomah Falls was our first stop of the A quick stop at the Most Expensive Bathroom in the World gave us awesome views of the Hood River. Then we were off to Mt. Rainier National Park, with a break at the Mt. St. Helen’s visitor center along the way. We never actually saw Mount Saint Helens since it was covered in clouds, but I took a picture of where the mountain was supposed to be anyway. En route to Mt. Rainier National Park, we stumbled upon an iron artist’s property, which was awesome. It’s well worth a stop if you’re ever in the area. The link to the artist’s webpage is here. That afternoon we explored Mt. Rainier National Park, threw snowballs at Oakley, set up camp, and took the coldest showers of our lives with water that I assume was from the snow melt. A campfire never felt so good.
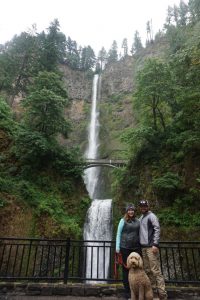
Two adults and a cute dog posing in front of Multnomah Falls.
Multnomah Falls. Pictures don’t do it justice!
A view of the Hood River with clouds in the reflection.
This was the view from the Most Expensive Bathroom in the World. It was crazy to see such a clear reflection in the river despite the cloud cover right over us!
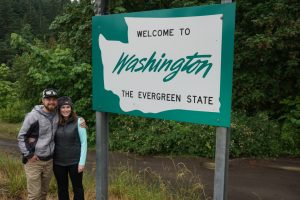
Posing in front of the Washington State sign.
Across the border we go!
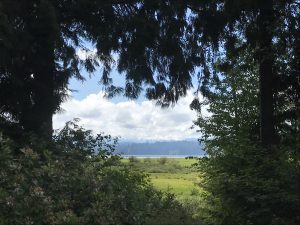
Several trees with Mount Saint Helens in the background.
Mount Saint Helens is supposed to be somewhere between those trees…
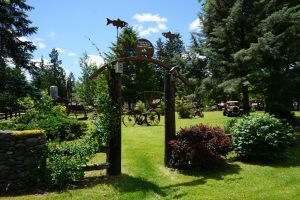
An open field filled with sculptures made of iron.
I think you could wander around this artist’s property for hours. The more you look, the more pieces of machinery, tools, and other knick knacks you see hidden in the art!
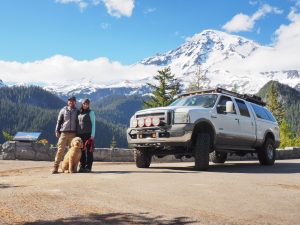
Two adults, a dog, and a truck in front of Mt. Rainier.
The mountain came out to play!
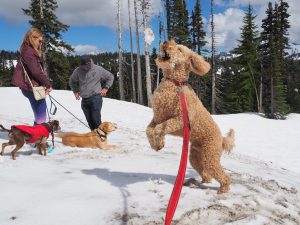
Cute dog jumping to catch a snowball.
No one had as much fun as Oakley at Mt. Rainier National Park, that’s for sure.
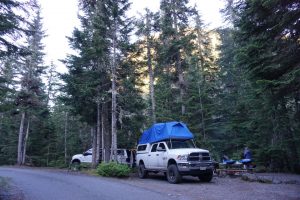
Two trucks at a campsite.
Our camp for night 3.
Dog cuddling with a toy in the truck.
Doodle pup desperate for a playmate.

Day 4

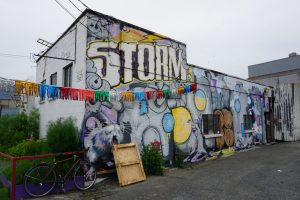
Border crossing day! We beelined from Mt. Rainier to the Canadian border, stopping for some scenic shots along the way. After stressing out about what we were able to bring across the border (and carrying all sorts of paperwork for the dogs), we learned that there’s really nothing to stress about during border crossings. The Canadian agents didn’t even ask about Oakley! We stopped at an AWESOME brewery (my personal favorite of the trip) called Strom Brewing in Vancouver to celebrate our arrival before exploring Stanley Park. We also had a delicious dinner at Tuc Craft Kitchen that night. From there we headed north to camp in a dispersed site along Sea to Sky Highway (which was pretty much like a rainforest). Also, approximately one hour after crossing the border, transmission issues started in the truck. And thus begins the narrative for the rest of our trip…
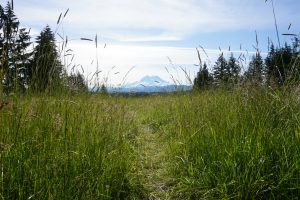
A grassy field with Mt. Rainier in the background.
Scenic stop number one…Mt. Rainier showing off once again!
A photo of Strom Brewing with graffiti on the walls in Vancouver.
The funkiest brewery in the middle-of-nowhere Vancouver. Their slogan is “So sketchy, but great beer”. Couldn’t describe it any better if I tried!
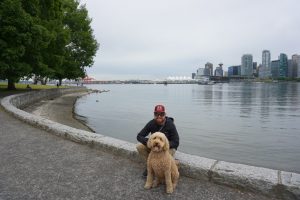
Tucker and Oakley posing in front of the Vancouver skyline.
Best buds at Stanley Park.
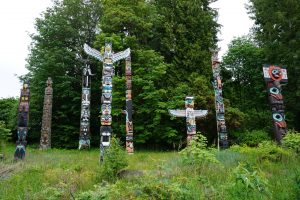
Native American Totem Poles in Stanley Park.
More Stanley Park sites. There is artwork and tributes to Native American history throughout the park.
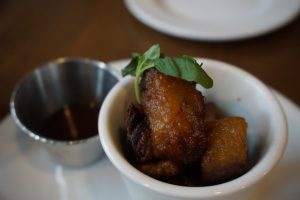
A close-up photo of pork belly bites.
One of the many bites from Tuc Kitchen…pork belly! It was amazing.
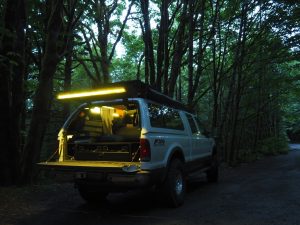
The truck parked in the forest during a rain storm.
The truck parked (finally) at our campsite after truck issues started. It was pouring rain all night at this campsite and it felt like we were in a rainforest. We woke up to find a leak in the camper shell (which led to soaked sleeping bags). Wet sleeping bags plus a faulty transmission meant a not so happy start to day 5!

Day 5

We knew this day would consist of the longest (and most challenging) drive of our trip, as the goal was to make it from just north of Vancouver to Mt. Robson Provincial Park taking windy mountain roads the entire way (approximately 500 miles total). When you write it out like that it sounds like a terrible idea even with a properly functioning vehicle. After much deliberation, we made the decision to try to nurse the truck and move forward with the drive. Basically, we were riding on a hope and a prayer, and “Jesus take the wheel” was never more relevant. That said, it was one of the most beautiful drives we’ve ever done. Because of truck issues, dealership stops, auto shop visits, and photo ops, we didn’t make it to our campsite until nearly midnight. To say we were exhausted is an understatement.
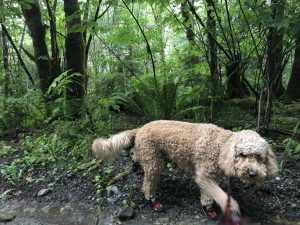
Dog walking through the mud with little boots on its paws.
Oakley on his morning walk through the rainforest, complete with his little boots to protect him from all the mud!
Two adults and a dog posing in front of the Whistler Olympic Rings.
Our morning stop in Whistler. We heard there are mountains around there somewhere…
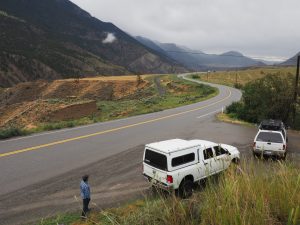
Two trucks pulled over on the highway with mountain views in the background.
Sea to Sky Highway pitstop.
Clouds covering the mountain tops on Sea to Sky Highway.
Pictures don’t do this drive justice. Even with rain all day, the scenery was spectacular!
Two trucks parked in the forest with a dog and adult posing for the camera.
Our campsite for night number five (taken the next morning since it was already dark when we finally made it to camp!). Notice the hood up on our truck…at this point we were just hoping it kept running until we made it back to the states.

Day 6

We woke up to find that our campsite was beautiful, AND it had warm showers with no time limit!!! It’s the little things in life… Tucker spent the morning filling the transmission with “emergency fluid” of some sort while I jogged along the river with Oakley. Then we packed up to head to ICEFIELDS PARKWAY! If you don’t know what Icefields Parkway is, it is a road that divides Jasper and Banff National Parks in Canada and runs north/south between them. It is considered to be one of the most scenic drives in the world, and was the spark that ignited the idea for this entire trip. I can already tell you that I will go back and visit again, and next time will spent several days traveling the parkway. It was incredible. After spending time in the little towns of Jasper and Banff, and visiting all the stops along the parkway, we camped at a little site called Two Jack Lakeside. It was one of my favorite camp spots of the trip. Minus the mosquitos that were the size of piranhas.
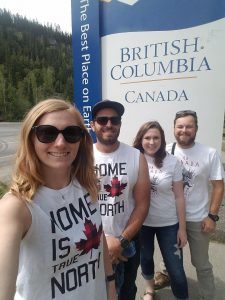
Four adults standing in front of the British Columbia sign.
Crossing the border from British Columbia to Alberta en route to Icefields Parkway. We went full tourist with some Canada shirts on this day!
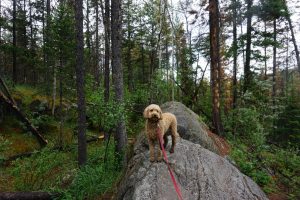
Cute dog standing on top of a boulder in the forest.
Mountain doodle on a hike in Jasper.
A large waterfall with mountains in the background.
Athabasca Falls in Jasper. Probably one of my favorite sites of the trip!
Tucker and Oakley in front of a turquoise river.
We loved how dog-friendly Jasper and Banff were. We were able to bring the pups to all of the sites and on hikes, too!
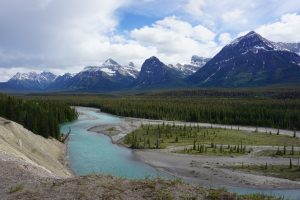
A turquoise river flowing alongside mountains.
The color of the water along Icefields Parkway was unreal. None of these photos have been edited!
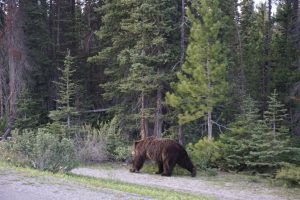
A large grizzly bear with trees in the background.
Oh, by the way, we just happened to see a GIANT grizzly walking along the side of the road. No big deal.
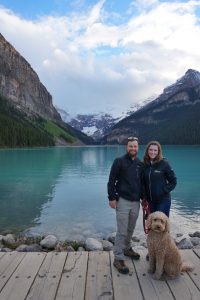
Tucker, Caitlin, and Oakley with Lake Louise in the background.
Lake Lousie is not overrated, even though I thought it might be. I could have spent hours there. Also, this photo was taken at 9:00 PM!
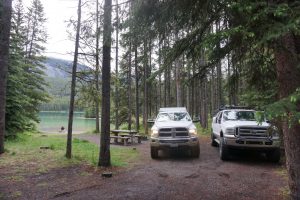
Two trucks parked in front of Two Jack Lake in Canada.
Our camp for night six just outside of Banff. What a site!

Day 7

Somehow it was time to leave Canada already…we got an early jump in the morning and made our way south toward Montana. Tucker was eager to get back to the states so that at least we were in our own country if the truck decided to give up. Not surprisingly, it took us longer to get back into the US than it did for us to get into Canada, and we had several engine shut-offs (due to the transmission overheating) as we waited in the long line of cars to get to the border agent. When we got to the border, the agent discussed very important immigration matters with us, such as how the maple syrup we bought in Canada probably came from Vermont. He also talked about fishing. And then we were free to go. We made our way to Glacier National Park, set up camp, and had a relaxing afternoon exploring Going to the Sun road, or at least the part of it that was open. Unfortunately, the middle portion of the road was still closed due to heavy snowfall. Glacier was beautiful, but our takeaway was that it is absolutely worth crossing the border and driving another couple of hours to see Icefields Parkway if you’re gonna do the whole glacier thing. The parkway is so spectacular that other parks seemed underwhelming to us!
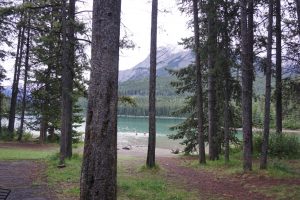
A view of Two Jack Lake through the trees with two men in the lake.
If you look really closely, you’ll see that Tucker and Jesse took an early morning dip in the freezing cold, glacier fed lake. You may not be able to see their faces, but I can assure you they were frozen cold after only a few seconds in that water!
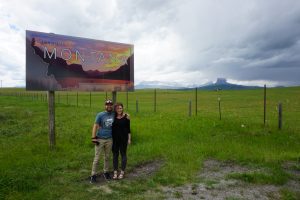
Tucker and Caitlin posing in front of the Montana sign.
Made it over the border and took a huge sigh of relief!
Tucker and Oakley in Glacier National Park.
We spent a relaxing afternoon in Glacier National Park. Oakley enjoyed a long walk around this new turf!
Two trucks parked at a campsite.
Our Glacier campsite for night number seven.
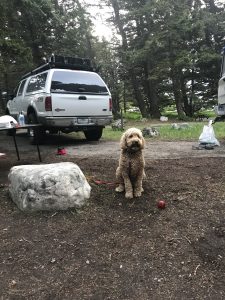
Oakley playing with a red ball at the campsite.
When this dog can be outdoors AND playing with a toy, he is on cloud nine.

Day 8

Initially we would have made a beeline east on this day to check out Montana and South Dakota. However, considering the fact that the truck could give out on us at any moment, we decided to omit the South Dakota portion of the drive and take our time seeing Montana and Wyoming. We made a scenic drive on the south side of Glacier National Park and went west toward Flathead Lake, which is absolutely massive and beautiful. I wouldn’t mind owning one of those lakefront homes, that’s for sure. A quick stop at Glacier Distilling was a nice break from the drive! We spent the evening exploring Missoula, tried a few local beers there, and watched locals raft on the river. We camped that in a dispersed site near Garnet Ghost Town.
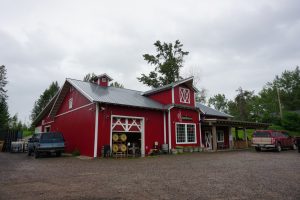
A large red barn which is home to a distillery.
This unassuming barn is the coolest distillery I’ve ever seen!
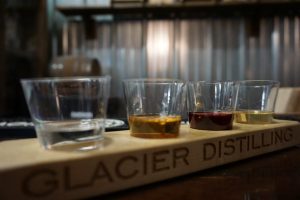
A tasting flight of four liquors at Glacier Distilling.
My flight at Glacier Distilling.
Caitlin, Tucker, and Oakley taking a "selfie" in a mirror in Missoula.
When you find a mirror in the middle of Missoula, you take a family selfie.
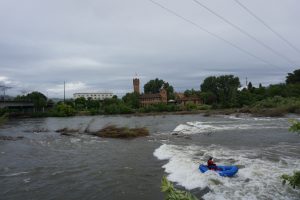
A rafter floating down a river in Missoula.
Rafting in the city.
Two trucks parked in the forest.
Our camp for the night. Nothing special, just a little spot tucked away in the forest.

Day 9

We started the morning by driving into Garnet Ghost Town and enjoying some hot breakfast in the freezing cold. We got to explore the ghost town before it opened, which meant we had the whole place to ourselves. It’s pretty crazy to see an abandoned town, complete with food, tools, and clothing left behind. Then we made our way east to see the towns of Helena, Butte, and Bozeman. Each town was very different. Helena was very refined with white picket fences and beautiful state capitol buildings. Butte was rustic and historic, with old brick buildings lining the streets of the mining town. We met some locals who own Quarry Brewing Company in Butte, and they told us a bit about the town’s history and culture. (P.S. We loved Quarry and highly recommend it if you’re ever in the area!) We also checked out the Berkeley Pit, a former open pit copper mine that exhibits a colorful lake due to the toxic waste from the mine. Bozeman was our last stop of the night where we visited another local brewery before heading south to camp outside of Yellowstone.
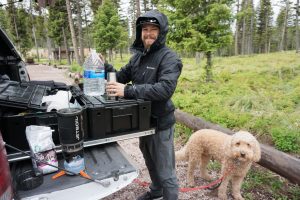
Tucker making coffee in the morning with Oakley standing beside him.
Tucker making the most important part of breakfast: coffee!
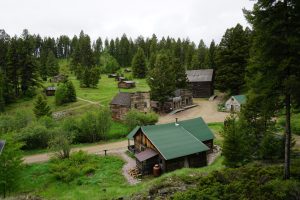
A birds eye view of Garnet Ghost Town.
View of Garnet Ghost Town. It is so well preserved!
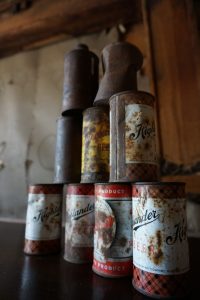
A stack of nine rusting Highlander Beer cans.
Old Highlander Beer cans found inside the ghost town. It’s pretty cool to see all the old brands of food and drink. Rest assured, Coca Cola bottles were in the mix, too. I think that was the only brand name I recognized of the bunch.
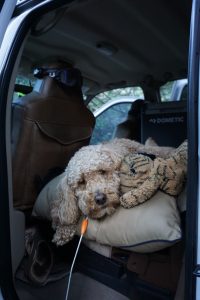
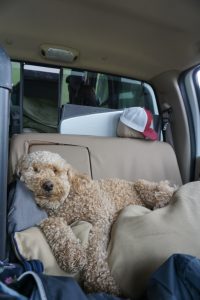
A dog sleeping in the backseat of the truck.
Tired doodle.
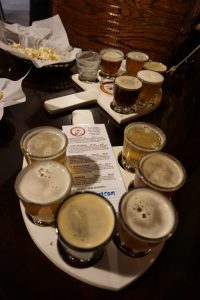
Six small glasses of beer at Quarry Brewing Company.
Flights at Quarry Brewing! I loved the shovel-shaped holder.
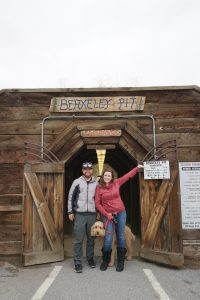
Tucker, Caitlin, and Oakley posing in front of the Berkeley Pit sign.
The tunnel to the Berkeley Pit, which is supposed to be a rainbow-colored body of water…
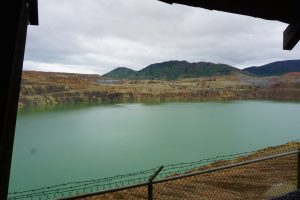
A large turquoise water reservoir filled with toxic chemicals from mining.
…but instead was the same color of turquoise we had seen at the national parks! However, the pit’s water is highly toxic, so it’s not quite the same as the glacial-fed lakes.
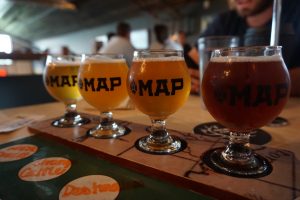
Four small beer glasses from MAP Brewing.
MAP Brewing was our dinner stop, and they happened to have great beer, too!
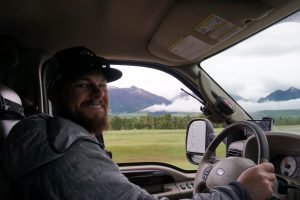
Tucker driving with clouds and mountains in the background.
Our fearless driver! One of the downsides of the truck issues was it meant Tucker had to do the driving for the rest of the trip (the last 10 days in total). He figured out a way to feather the pedals so the transmission didn’t slip as much, which required two-footed driving (something I’m not capable of). But, it was probably that skilled driving that kept us going for so long!
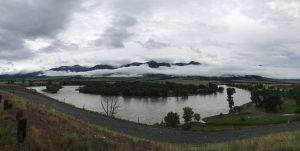
A bend in the Yellowstone River surrounded by clouds and mountains.
The arial view of our campsite for night nine. The little spots on the right of the frame were where we stayed. We were just feet from the edge of the Yellowstone River!

Day 10

One of the benefits of skipping South Dakota was that we had two days to explore Yellowstone instead of one (which ended up being a blessing in disguise…see day 11 for details). After some awesome breakfast burritos from a rafting shop in Gardiner (Wild West Rafting I think) and probably the best coffee of the trip from a little touristy shop a couple doors down (go figure!), we entered Yellowstone from the north end and made our first stop at Mammoth Hot Springs. It was otherworldly. And very smelly. Then we went to the south end of the park, spent some time stuck in construction traffic (hint…recurring theme ahead), drove through Grand Teton National Park, and spent the late afternoon and evening exploring Jackson Hole. Jackson is the coolest little Old West town, I could have spent all day there! It is also home to Snake River Brewing which has fabulous beer. We camped inside Grand Teton National Park for the night and enjoyed our first night without rain for nearly the entire trip.
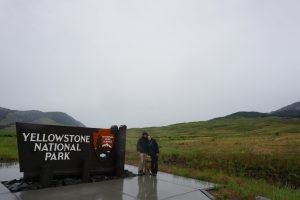
Tucker, Caitlin, and Oakley standing next to the Yellowstone National Park sign.
We awoke to a rainy morning and began the trip through Yellowstone!
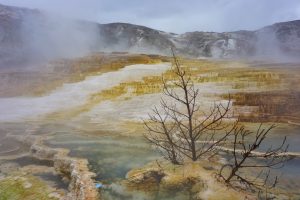
A small tree growing in steaming hot springs.
Mammoth Hot Springs was the first stop, and it was one of the most awesome things I’ve ever seen. Check out that little tree growing in the hot springs!
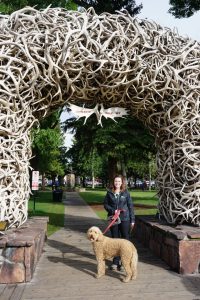
Caitlin and Oakley posting under an arch made of antlers.
Antler arches in Jackson Hole, Wyoming. I loved that little town!
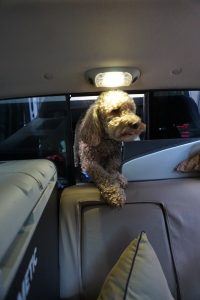
Oakley crawling through a small window from the bed of the truck to the backseat.
After our brewery stop in Jackson Hole, we returned to the car and thought Oakley had gone missing! We were so scared and didn’t know what to do. Suddenly a furry head popped through from the bed of the truck. Oakley had taken it upon himself to maneuver his way between the bed and the cab of the truck! From that point forward he sat in the bed for almost the entire rest of the trip. He was very proud of himself.
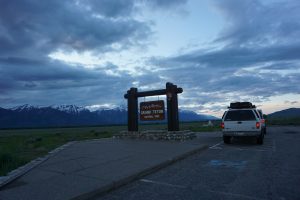
A truck parked next to the Grand Tetons National Park sign with mountains in the background.
The clouds finally cleared and we were able to see the Tetons on our way to camp for the evening.
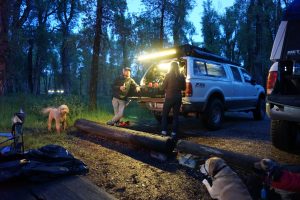
Two adults and three dogs at a campsite.
Relaxing at camp before bed. Finally a late night with no rain! It was our first rainless evening in 10 days.

Day 11

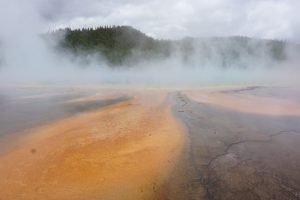
Day 10 in Yellowstone taught us that the best way to enjoy the park is to experience it early in the day, so we got up super early to head north and see Old Faithful this morning. The geyser erupted right on time, and then we were off to see Grand Prismatic Springs. It was chilly out, which meant that the hot springs were extra steamy and obstructing the view, but it was still pretty awesome (and smelly) to see. We had a quick brunch along a scenic road with some geysers in the background before continuing north to see more sites. Or so we thought. It was at that point that we ended up in traffic once again, this time with no warning. The Yellowstone newspaper given to guests at the entrance advised us that construction traffic would result in a delay of up to 30 minutes, but after traveling only four miles in two and a half hours’ time, that clearly was not the case. We had previously booked a campsite in the park for this night, but figured (based on the very limited information we had available to us) it would have taken at least 5 hours of dealing with traffic to make it to our campsite. So, we made the decision to leave the park early and head to Idaho. We were really disappointed that we had to make this decision, but the traffic and lack of communication from the park’s services led to more frustration than it was worth. Instead, we made our way toward Idaho Falls and stopped to check out some sand dunes along the way. (For what it’s worth, the campsite did refund our fee due to the situation, despite their no refund policy. So that was nice at least.)
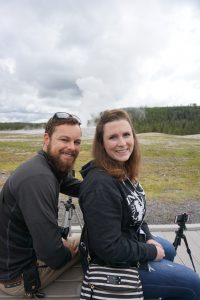
Caitlin and Tucker in front of the Old Faithful geyser.
Good ol’ Old Faithful.
Steam rising from Grand Prismatic in Yellowstone.
Grand Prismatic all steamed over!
Jesse making breakfast in Yellowstone National Park with Oakley in the foreground.
Tailgating in a National Park…I highly recommend it!
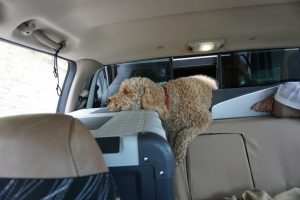
Oakley resting his head on the fridge staring out the window of the truck.
This is pretty much how we felt waiting in traffic in Yellowstone.
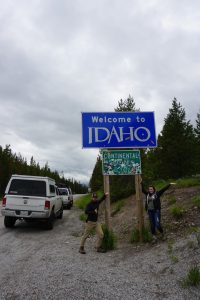
Caitlin and Tucker in front of the Idaho sign.
Can you tell we were excited to be in Idaho after all that traffic?!
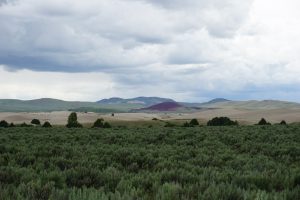
A landscape of sand dunes in Idaho.
Idaho dunes!
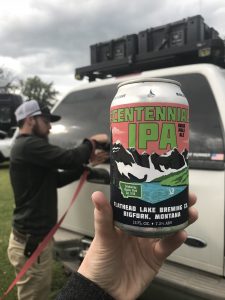
A can of Centennial IPA with Tucker and the truck in the background.
A well-deserved beer upon arrival at camp. One from Flathead Lake Brewing Company in Montana, no less!
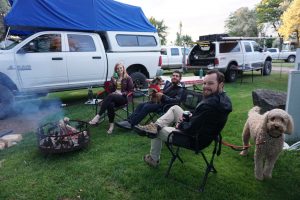
Three adults and two dogs sitting by the campfire.
Relaxing by the fire in the evening.

Day 12

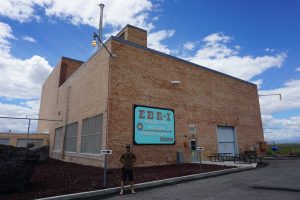
Getting to Idaho early meant we had more time to explore the area. Enter: The Idaho Potato Museum! This is the quirkiest little museum ever, but we loved every second of it (especially the singing Mr. & Mrs. Potato Heads and the free taters for out-a-staters). From there we made our way to Craters of the Moon National Monument and made an impromptu stop at EBR-I (the world’s first nuclear power plant) on the way. Tucker was in heaven at this museum. Craters of the Moon was pretty awesome too, but a much shorter and less dog-friendly stop than we anticipated. So, from there we decided to go up to Sun Valley to camp for the night. This was easily my favorite campsite of the trip, and Sun Valley itself was awesome, too. Sawtooth Brewing was our destination for dinner and drinks, and both the food and the beer was fantastic.
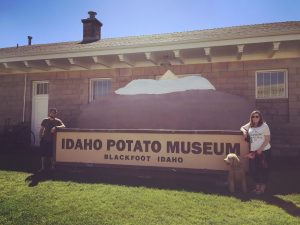
Caitlin, Tucker, and Oakley in front of the Idaho Potato Museum.
I’m obsessed with this museum. One of my favorite stops of the trip!
Tucker standing in front of EBR-1.
EBR-I from the outside.
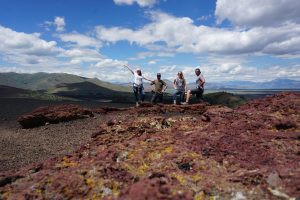
Four adults posing at Craters of the Moon National Monument with mountains and clouds in the background.
View from the highest point within Craters of the Moon National Monument. We were so happy to finally have good weather for the entire day!
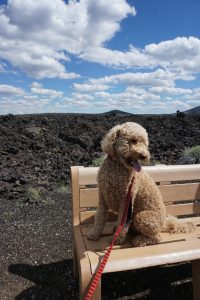
Oakley sitting on a bench with lava rock in the background.
Oakley wasn’t a fan of all of that lava rock…it made for a HOT afternoon!
Two glasses of beer on a table.
Next stop: beer!
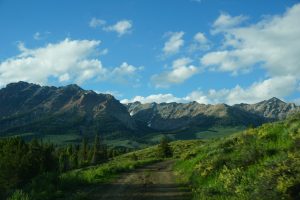
Mountains and fields in the Sawtooth National Forest.
Views of the Sawtooth National Forest. It never gets old!
The truck parked next to a fire ring in the Sawtooth National Forest.
Our campsite for the night, which was amazing!
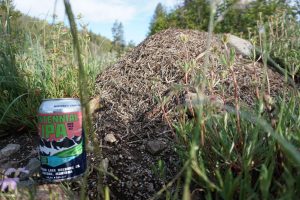
A can of beer next to a giant anthill for scale.
Also, this pile of twigs is an anthill. Beer can for scale. The ants were larger than life, too!

Day 13

This was the start of making our way home as we traveled south to Utah. We stopped at Shoshone Falls on our way, which is referred to as “the Niagara of the West”. I had never even heard of Shoshone Falls before, but it was incredible! The mist from the falls felt great as the day was setting up to be a hot one. Then we visited Mammoth Cave, just south of Shoshone. I don’t really know what to say about this experience other than it was strange… I never expected to find peacocks roaming through the desert of Idaho, much less the collection of taxidermy that awaited us as we walked through the door. The signage on the cave was pretty funny, too. Then we were southbound for the Great Salt Lake (which is not what I expected it to be at all), with a quick spur-of-the-moment stop at the Golden Spike in the middle of the Utah desert. An easy dinner at a brewery followed (where we learned all about Utah’s liquor laws), and then we were off to our campsite where we saw a moose!!! In Utah of all places…
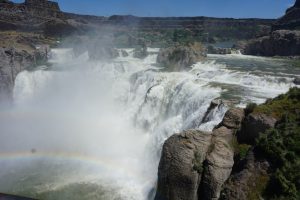
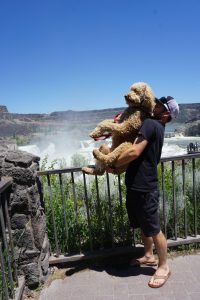
A double rainbow over a giant waterfall.
There were rainbows striped all over the falls. We were also covered in mist just standing at the top of the cliff overlooking the falls.
Tucker holding Oakley in front of the waterfall.
We told Oakley that everything the light touched was his kingdom…ha!
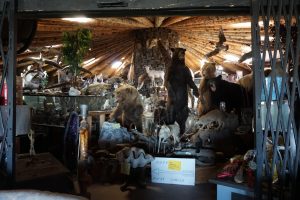
A circular room filled with taxidermy.
This is what we were greeted with when we went to visit Mammoth Cave. Definitely the strangest experience of our trip…
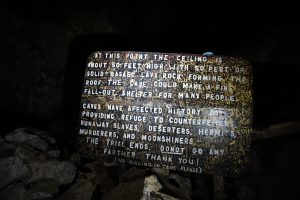
A sign found inside Mammoth Caves.
This is what we found at the end of the cave walkway. It was hilarious and unnerving all at the same time!
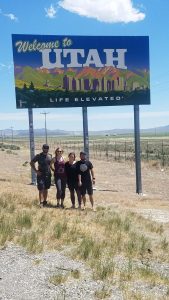
Four adults in front of the Utah state sign.
Across the border to Utah we went!
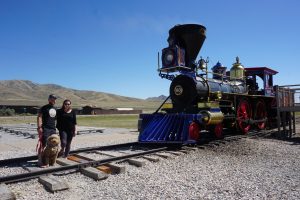
Caitlin, Tucker, and Oakley at the Golden Spike National Historic Site standing next to an old train.
Our impromptu stop at the Golden Spike National Historic Site. We made it just in time to see the train demonstration. I wish trains still looked like that today, they were beautiful!
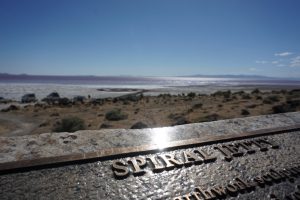
A view of the Sprial Jetty at the Great Salt Lake.
The Spiral Jetty at the Great Salt Lake. The Jetty is made from natural elements, and is only visible when the lake’s water level is low. It was created by sculptor Robert Smithson as an art exhibit. The purple hue from the water is caused by microbes in this part of the lake.
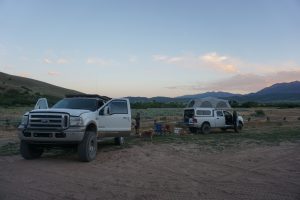
Two trucks parked in a field during sunset.
Sunset over our campsite on night 13. Although we never expected it, we saw a moose run by our site this evening. In Utah of all places!

Day 14

This was an easy day of making our way to southern Utah for our last night of the trip. It was forecasted to be a hot day (over 100 degrees), so we changed plans and made an attempt to camp at high elevation instead of near Zion like we originally planned. There was some truck maintenance in Salt Lake City (hoping a replacement part would help fix the transmission issue…spoiler alert: it didn’t), and a visit to Black Rifle Coffee Company as well. If you don’t know about Black Rifle Coffee Company, learn more about them here. It is a US veteran run business, who make an effort to employ veterans as well. It was nice to support them by buying some coffee and mugs! Our last night of camping was spent in the mountains of red rock country, where our campsite backed up to a small river. Oakley had the time of his life running through the water and mud. Needless to say, his first stop upon arriving home the next day was the bathtub.
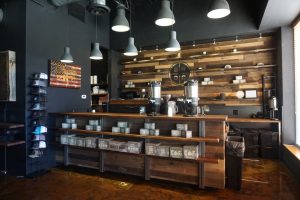
Inside of a coffee shop.
Inside Black Rifle Coffee Company. This place was an awesome find! Great coffee and great people, too.
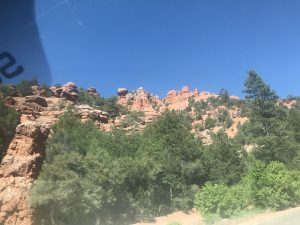
Red rocks and trees on the side of the road.
Passenger seat photography as we climbed the red rock mountains to our campsite. What a beautiful drive!
Truck parked among trees at a campsite.
Got to camp early (for once) and enjoyed the evening in the river and by the fire.
Cute dog standing in small river.
The dogs were so happy to find the stream behind our campsite! It was a hot day, so it was a perfect way for them to cool off.
Dog covered in mud after running through the river.
This dog was caked with mud after running through the river that afternoon.
Oakley and Tucker by the fire.
Hanging by the fire.

Day 15

There wasn’t much to this day besides an early rise and the drive back to California. As tradition has it, we often stop for In N Out Burger at the end of any good road trip or camping trip, so it only seemed appropriate to make a pitstop there on our way home. A few miles later we put the truck in park, in complete disbelief that we had made it all the way home with a faulty transmission.
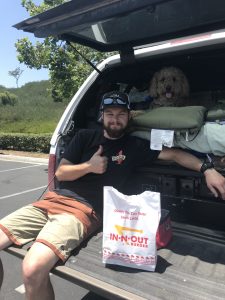
Oakley and Tucker in the back of the truck with a bag of In N Out Burger.
One last tailgate before heading home.


Since we’ve been back, the truck has been diagnosed and we’ve found out that the transmission it toast…which makes it even more incredible that we made it 4,000 miles home after the problem began! Someone must have been looking out for us.


I had intended for this recap to be brief, but as I starting writing I realized just how much we covered in two weeks’ time! Oh, well. One thing we know is that we’ve only scratched the surface on exploring these places. We can’t wait to get back on the road (with a functional transmission this time) and see what else is out there.


Like what you read? Give it a share!


5 Summer Side Dishes (Healthy, Simple, and Delicious!)

I’ve developed some new side dishes recently that are both healthy and refreshing, perfect for summertime! What each of these dishes have in common is how healthy and simple they are to make. You can add these as side dishes at your next summer barbecue, or throw them together for an easy weeknight meal. Regardless of when you use them, these flavor-packed recipes are sure to impress!


Spinach, Avocado, & Tomato Salad

White bowl with tomatoes, spinach, and avocado.
Healthy, filling, and pretty, too!

Ingredients:

¾ cup julienned spinach leaves

1 large avocado

6 oz grape tomatoes

1 tbsp olive oil (more to taste if needed)

Salt and pepper to taste


It’s amazing that just a few simple ingredients can pack such a punch with flavor. That’s the case with this salad, which is hearty, filling, and refreshing all at the same time. You can easily turn this into a meal on its own by adding chicken or even bacon to the mix. Perfect for an on-the-go meal!

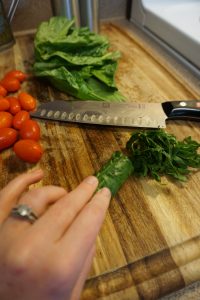
Cutting board with tomatoes and spinach.
This is the trick to julienned spinach leaves!

Wash and dry spinach leaves, removing any excess stems. Stack and roll the spinach leaves, then cut into thin strips (julienne). Halve the grape tomatoes and add them to a bowl with the spinach. Score the avocado into 1-inch cubes, and scoop the chunks into the salad bowl. Add olive oil, salt, and pepper, and gently mix until the salad appears creamy. Adjust seasoning if needed, then serve! (Note: If you are making this dish in advance, add a couple teaspoons of lemon juice to help prevent the avocado from browning.)

Serves: 4


Lemon Herb Zucchini

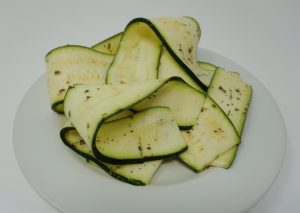
White plate with ribbons of zucchini.
These ribbons may look simple, but they are totally packed with flavor!

Ingredients:

2 zucchini

1.5 lemons

2 tbsp Herbs de Provence

Salt to taste


This French-inspired, no-cook (yes, you read that right, NO COOK!) side dish is one of the most simple and delicious ways to enjoy zucchini in my opinion. I adapted this from a recipe that my mother-in-law learned while visiting France. It has since become a staple in our home!

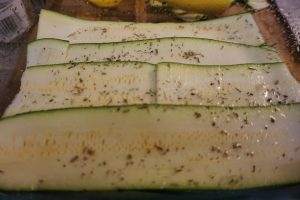
Layers of zucchini ribbons in a dish.
Layer the zucchini ribbons like lasagna to marinate. It should look a little something like this…

Using a mandoline (or some of your own excellent knife skills if you so choose), slice zucchini as thinly as possible, no thicker than 1/8th inch thick. Once sliced, arrange zucchini slices into layers in a rectangular dish. After each layer, season with a pinch of salt, sprinkle of Herbs de Provence, and lemon juice (about 1 tbsp per layer). Repeat until all zucchini has been layered and seasoned in the dish. Set the zucchini aside to marinate for at least 30-minutes, or as long as overnight. As the zucchini marinates, the acid from the lemon juice will essentially “cook” the zucchini, leaving it tender and full of flavor. Gently mix the zucchini before serving.

Serves: 4


Grilled Fruit Salad

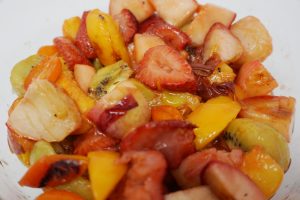
Assorted fruits in a bowl.
This may be the juiciest fruit salad you’ll ever enjoy!

Ingredients:

1 lime

2 white peaches

2 nectarines

2 kiwis

½ cup kumquats

1 cup strawberries

1 tbsp honey


What’s a summer barbecue without a fruit salad? Put a twist on the old classic by grilling the fruit before serving! Grilling allows the sugars in the fruit to caramelize and gives you an end product that is sweet, juicy, and exploding with flavor.

Cut the strawberries, peaches, and nectarines into large chunks—no need to be fancy with this! Halve the kumquats or leave them whole, your choice. Then, Halve the lime and kiwis and place them face-down in a grilling rack for the barbecue. Add the rest of the fruit and grill them over medium heat for about 10-minutes, or until slightly charred and juicy. (Note: If you don’t have a grilling rack, you can use skewers and grill the fruit like kabobs. Just make sure the chunks are plenty big if you do it this way…the fruit will shrink up as it cooks.)

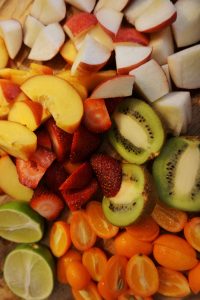
Cutting board full of raw fruits.
The medley of fruit before cooking.

Remove the fruit from the grill and allow it to cool slightly before transferring the fruit to a serving bowl. Using a small spoon, scoop the kiwi fruit out of its skin and add it to the bowl (this is so much easier than peeling the kiwi beforehand!). Squeeze half of the lime over the fruit, add honey, and gently mix. Taste the fruit salad—if desired, the other half of the lime juice can be added. Then, serve!

You can swap any of the fruits I used in this recipe for fruits of your choice. Charred grapes would be delicious in this salad, and any type of stone fruit (apricots, plums, etc.) would work well, too. I suggest saving the leftover fruits and juices (if there is any!) for other recipes. Add them to a smoothie for extra sweetness, or if you’re in the mood for dessert, serve the leftovers with some ice cream or whipped cream. It’s delish!

Serves: 4


Lemon Garlic Kale

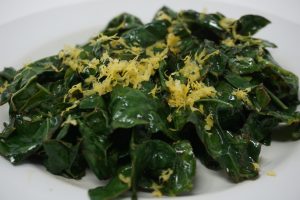
White plate with sauteed kale and lemon zest.
My mouth is watering just looking at this picture…who knew kale could be so good!

Ingredients:

1 bunch of Tuscan Kale (approximately 6-8 large stalks)

2 cloves garlic

2 tbsp olive oil

2 tbsp lemon juice

Salt & Pepper to taste

Zest of 1 lemon (for garnish)


This recipe is my recent obsession. I make it at least twice a week, and I think I could eat it every day and never get tired of it!

This simple recipe has a trick to it that should become part of your veggie-cooking arsenal. As backwards as it may seem, all of the seasoning happens before the kale is even added to the pan. Seasoning the dressing allows for the flavor to spread evenly throughout the kale leaves as they cook. Try this trick for all of your sautéed veggies moving forward!

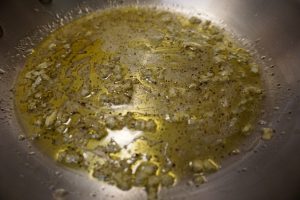
Frying pan with olive oil, garlic, salt, pepper, and lemon juice.
The magic takes place before the star of the show goes in the pan…just let it do its thing on low heat and the rest will fall into place!

Wash and dry the kale, and remove the leaves from the stalks. Slice leaves into 1-inch strips and set aside. In a medium sauté pan, combine olive oil, lemon juice, garlic, salt, and pepper. Heat the pan over medium-low heat until the garlic is fragrant, but not browned, and the salt has dissolved into the oil/lemon juice mixture. Then add in the sliced kale and gently mix until the kale is evenly covered in the dressing and it has begun to wilt. Remove from heat and serve immediately, garnished with lemon zest (if you’re feeling fancy that is…I usually can’t wait long enough to make it look pretty before I start devouring this dish!). This 5-minute side dish is packed with flavor and is the perfect accompaniment to any meal!

Feel free to substitute the kale with other hearty greens like chard, or repeat this process with spinach if you prefer.

Serves: 2


Pickled Onion and Kumquat Relish

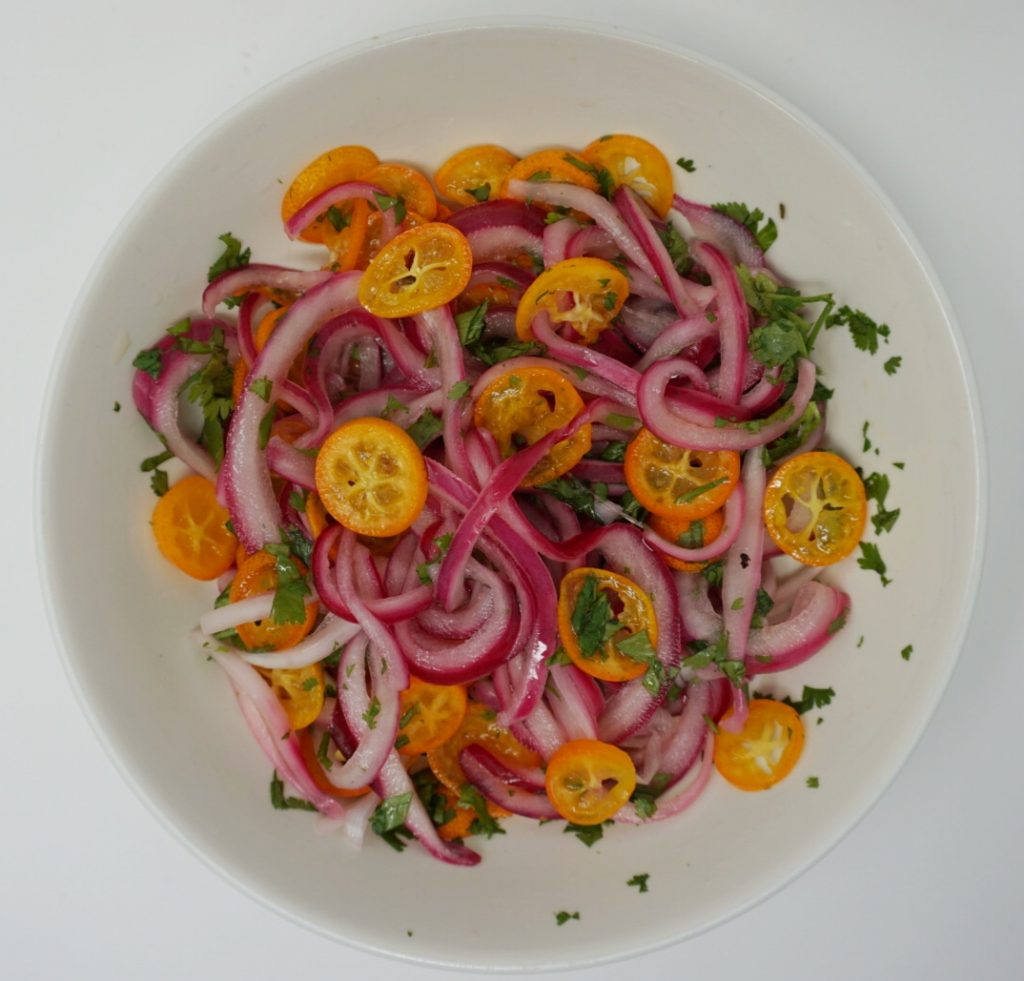
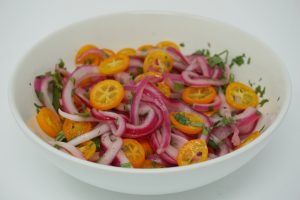
White bowl with pickled red onion, sliced kumquat, and cilantro.
This might be the prettiest dish I’ve ever created, just look at those colors!

Ingredients:

1 cup pickled red onion, thinly sliced

½ cup thinly sliced kumquats

4 tbsp cilantro, chopped

½ tsp sugar (optional)


This simple dish is packed with flavor and brightens up any plate with both its color and flavor. This relish can be served on its own, or can be served over chicken, pork, or even fish. It is so simple to make, but will surely impress any crowd.

If you don’t have pickled red onions on hand, don’t fret. They are super easy to make and are a great staple to have in the fridge! I used this recipe from Budget Bytes to make mine and they turned out great. The pickling itself took less than an hour, too!

While onions are pickling, cut the kumquats into thin slices. Taste your kumquats to gauge their flavor…if you’ve got a sweet batch, lucky you! More often than not, kumquats tend to be pretty tart. If they are too tart for your liking, sprinkle ½ tsp of sugar on them to sweeten them up.

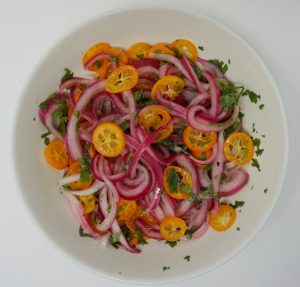
Birds eye view of kumquat salad.
So simple, yet so perfect.

Combine your red onion, kumquats, and cilantro in a bowl and mix well. And…that’s it. It’s really that simple, but oh so impressive. And what a unique combination of flavors to showcase at your next summer barbecue!

Serves: 4


Which of these recipes will you feature with your next summertime meal? Let me know in the comments below!

The Truth About Canned Wine: Part 2!

You may remember my recent blog post about my trial of canned wine (find it here if you haven’t read it). The post stirred up a lot of attention, especially because the brand of wine I tried didn’t get stellar reviews in my book. So, I decided to do a “part 2” review of canned wine, this time featuring wines from  California.

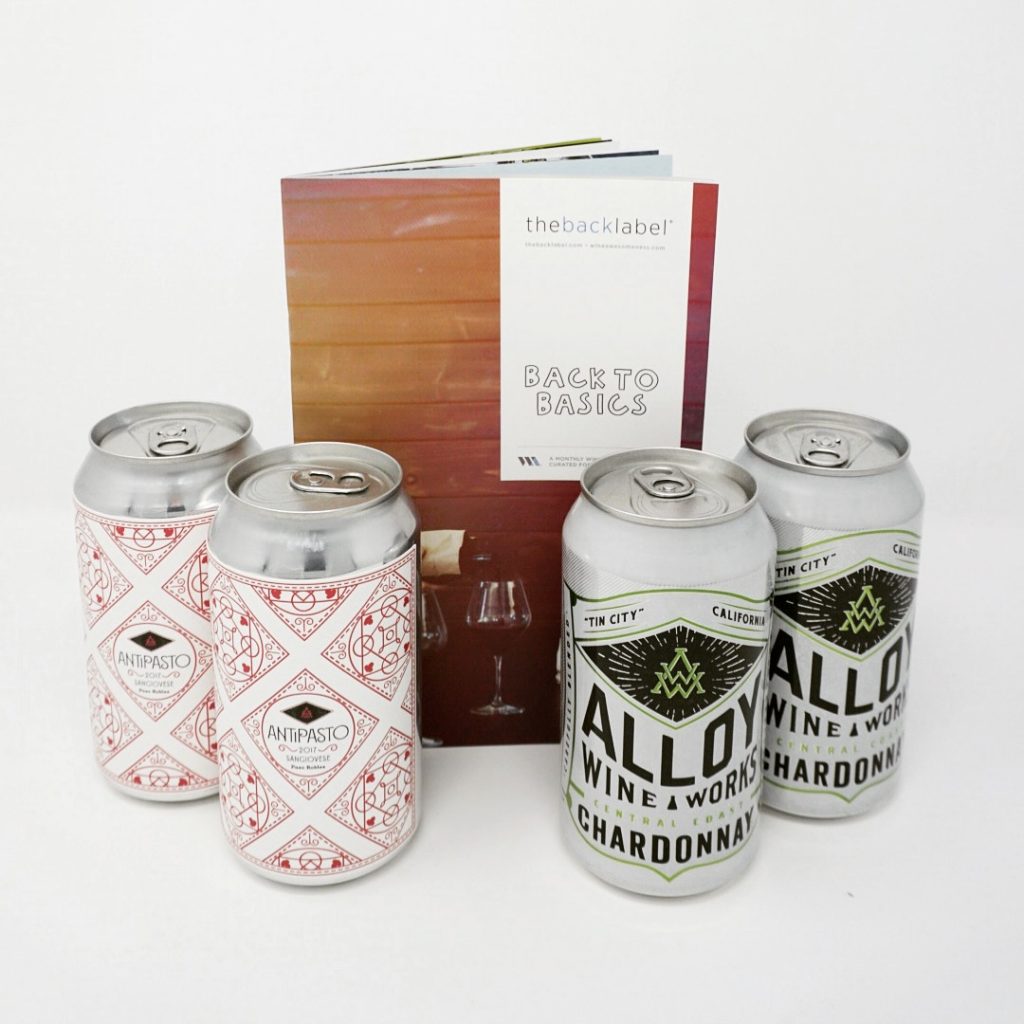
Four cans of wine and an educational booklet.
Each of these cans holds half a bottle of wine!

I was excited to find that my most recent Wine Awesomeness box featured these two canned wines, which allowed me to get my hands on some cans that are not widely distributed at local stores. Wine Awesomeness also does a great job sourcing quality wines, so my hopes were up before giving these cans a shot! (Check out my full review of Wine Awesomeness here!)


Canned Wine 1: 2017 Antipasto Sangiovese, Paso Robles

This red is fruit forward in flavor, with low tannins and acidity. It emulates a berry jam-like flavor. This makes it an easy to drink wine, and heads above the previous reds I tried from a can! What’s especially interesting about this wine is how it’s made. As opposed to a traditional fermentation process, this wine is made using carbonic maceration. What does this mean? In basic terms, grapes are added to the vats while they are still whole, and the grapes ferment from the inside out. As a result, winemakers can create wines quickly (sometimes in only 6-weeks!). This process also guarantees more fruit-forward flavors in the wine, as opposed to tannic, full-bodied wines produced using traditional methods.

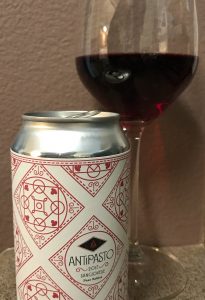
A can of Antipasto wine with a glass in the background.
This wine has a jammy color and flavor.

Overall, I would recommend purchasing this wine, particularly if you are a fan of fruity reds!


Canned Wine 2: 2016 Alloy Wine Works Chardonnay, Paso Robles

This chard is both bright and buttery in flavor, and has a wonderful golden hue to it. I was pleasantly surprised to find an almost-oaky flavor upon my first sip, and each sip thereafter just got better. This canned Chardonnay is just as enjoyable as any bottled Chardonnay, and there’s no hint of metallic taste from the can at all.

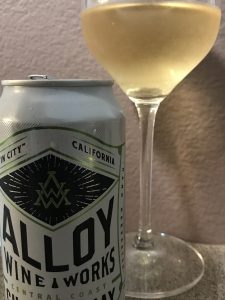
A can of Alloy Wine Works wine with a glass in the background.
Check out that buttery gold color of Chardonnay!

Alloy Wine Works calls “Tin City” in Paso Robles its home. Tin City is a mini-town of corrugated steel buildings dedicated to all things wine, beer, and cider. It rewrites what it means to go wine tasting, taking you out of the vineyards and into tasting rooms. Plus, it eliminates the reliance on transportation in between destinations. I highly recommend a trip to Tin City if you find yourself in the Paso Robles area!

A photo fo the entrance to Tin City in Paso Robles.
Those two white signs point you in the direction of dozens of wineries, breweries, and cideries. You could call Tin City a dangerous place…or the happiest place on earth.

Overall, Alloy’s Chardonnay gets a “highly recommend” in my book. It’s the best canned wine I’ve had to date!


What are your feelings on canned wine? Let me know in the comments below! Cheers!

The Sweetwine Club: My Honest Review

If I were to describe my taste in wine, the words bold, peppery, and full-bodied come to mind. But when I was offered the opportunity to give The Sweetwine Club a try, I couldn’t resist the opportunity to explore a few new wine profiles!

A bright orange box with three bottles of wine.
Check out that not-so-discrete bright orange box! Note: The Sweetwine Club sent me this box and asked me to review their wine subscription box. All opinions are my own!

The bright orange carry-box showed up at my doorstep with three wines in tow: Stella Rosa Green Apple, Stella Rosa Tropical Mango, and Fresca Frizzante Black Bellini. The weather in Southern California heated up just in time to enjoy these three refreshing sips!

Three bottles of wine.
From left to right: Tropical Mango, Black Bellini, Green Apple.
I tried the Stella Rosa Green Apple first.

The smell of the bottle reminded me of Green Apple Jolly Ranchers! The taste was sweet, but not overly sweet. It’s definitely a great drink to have poolside, or as you try to cool down on a warm afternoon. This bottle runs at 5% ABV.

Next up, Stella Rosa Tropical Mango.

It was slightly less sweet than the Green Apple, but was filled with a tropical flavor, something you don’t often find with wine! Again, another perfect summertime sip. This bottle also runs at 5% ABV.

Finally, the Fresca Frizzante Black Bellini.

This was my favorite sip of the box, and is probably the most versatile, too! The wine gives it a sweet base, and the fruit juice gives it a hint of tartness. The recommended recipe for this bottle is to combine one-part Black Bellini with one-part Prosecco. I think that combo is a definite winner, and a perfect way to mix up your typical mimosa during weekend brunch. This bottle runs at 6.5% ABV.

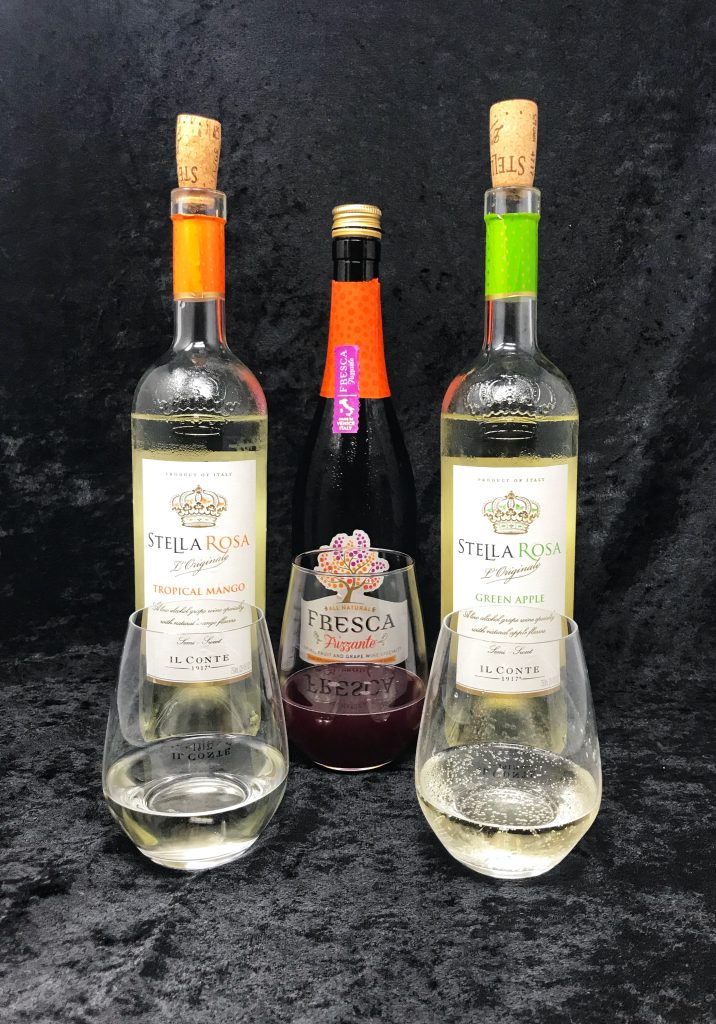
Three glasses of wine with three bottles in the background.
All of these sips had a slight effervescence to them. Not quite sparking wine, but not flat either.
My final thoughts on The Sweetwine Club:

If sweet wines are your thing, you’ll love it! It’s nice to see a box subscription focused on one particular taste, as opposed to a mixed wine box or a box focused on sourcing their wines from a particular region. I also think all of these bottles lend themselves well to cocktail mixers. Whether it be a sweet wine mimosa, or something more creative like a spin on a margarita or cosmo, you can’t go wrong with adding these sips to your ingredient list!

Three glasses of wine with three bottles in the background.
Cheers!

Find out more about the club here. Happy sipping!

Rosé Mojito: A Fun Twist on a Classic Cocktail

Warmer weather, springtime blooms, chilled Rosé wine in the fridge…it must be May!

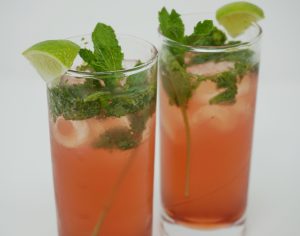
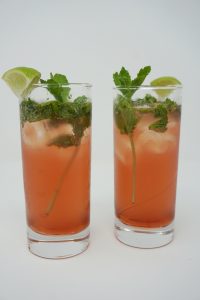
Two tall glasses filled with a pink mojito.
Sneak peak of what you could be enjoying if you follow this recipe!

When Amanda over at The Glorious Grape let me know she was dedicating the whole month of May to the pink beauty that we know as Rosé, I knew I had to get in on the fun. Amanda asked me to create a Rosé-based recipe to celebrate the occasion, and my recipe wheels got turning!

I knew I wanted to create something refreshing that could be enjoyed at Memorial Day BBQs or on a warm day at the beach. For me, a mojito always does the trick in those moments! So, I came up with this recipe for a Rosé Mojito, complete with homemade Rosé simple syrup. Check out the recipe below!

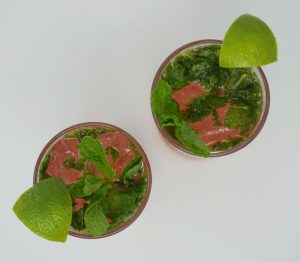
Birds eye view of the mojitos.
Mmm…writing this makes me want another one!

Rosé Mojito

Makes 2 servings

Ingredients:
1 bottle of your favorite Rosé Brut (sparkling Rosé)
2 ounces white rum
1 bunch of fresh mint leaves
½ cup granulated sugar
2 limes
10-12 ice cubes
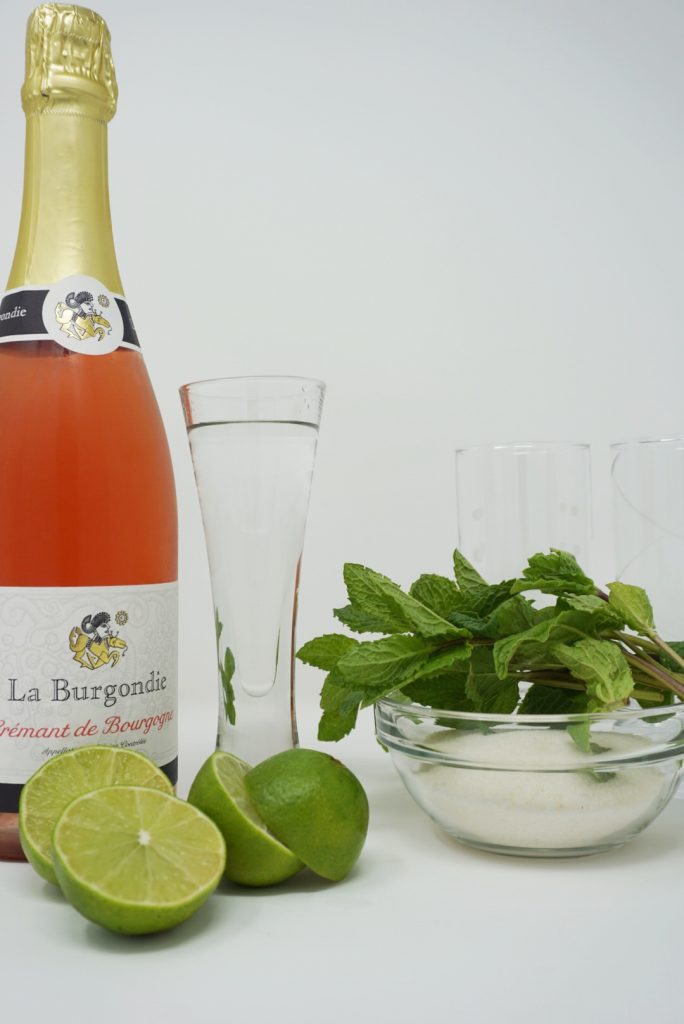
A bottle of wine, sliced limes, rum, sugar, and mint.
The ingredients all lined up and ready to go!

Step 1: Make the simple syrup.

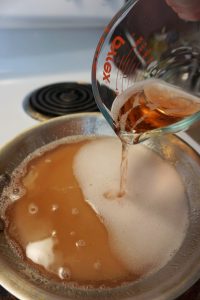
In a small saucepan, combine 1 cup of your sparkling Rosé with the sugar. Heat over medium-high heat, stirring constantly, until the sugar fully dissolves and the mixture comes to a rolling boil. Once it reaches a boil, reduce the heat and allow the syrup to simmer for 10-15 minutes, or until it has reduced by about half. Remove the pan from the heat and allow the syrup to cool fully before mixing your mojito.

A pan on the stove with simple syrup cooking.
Making Rosé simple syrup…so easy and so delicious!

The flavor of your bottle of Rosé will greatly influence the flavor of your simple syrup. Any Rosé Brut will do for this recipe, but do make sure to choose a decent bottle that you like the flavor and aroma of. I liked this $10.00 bottle (La Burgondie Rosé Brut from France) that I picked up from the store—it had a really nice fruity aroma, but was buttery and smooth to drink. I had a little leftover after making my mojitos, and I really enjoyed just drinking it by the glass! The simple syrup was vibrant and bright in flavor with a hint of citrus after this Rosé reduced down.

Note: You will have more simple syrup than you need for two mojitos, but don’t let the leftover go to waste! Use the syrup to make a yummy Rosé dessert. Or, just make lots more Rosé Mojitos!


Step 2: Mix your mojito.

Add your mint and the juice of one and a half limes to a cocktail shaker and muddle them together. (Save the other half of a lime for garnishing.) Then, add the rum to the cocktail shaker and shake to mix.

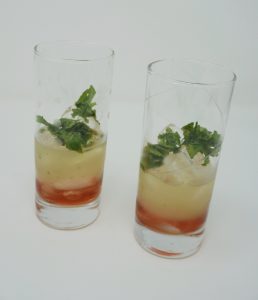
Partially empty glasses filled with simple syrup and rum.
Simple syrup on the bottom, rum on the top. How pretty is that?!

In your favorite mojito glasses, add ice and a splash of simple syrup (to taste, if you like sweeter drinks then add a little more). Then, pour your muddled mint, lime, and rum mixture evenly between the glasses. Top each glass with your sparkling Rosé, and garnish with a sprig of mint and a wedge of lime. If you like a very minty mojito, add a little more of the muddled mint to your drink.

Two glasses of mojitos.
The finished product!

This boozy indulgence is a perfect way to relax on a weekend afternoon. It’ll have you saying, “Yes way, Rosé!” this May. Cheers!

The Most Epic Beer I Ever Drank (Hint: It involves the Alps!)

I once drank a beer on top of the Alps. My bet is that not many people can say they’ve done the same in their lifetime!

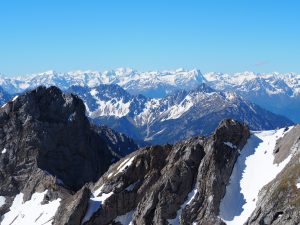
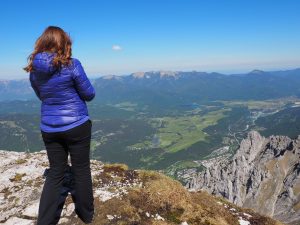
Views of the peaks of the Alps.
This will probably be my favorite view for years to come. Pictures just don’t do it justice.
One of the most amazing trips we’ve taken to date was in the summer of 2017 when we took a road trip through Bavaria.

I was inspired to do this trip after reading a blog post by Bruised Passports, where they detailed their off-the-beaten-path destinations throughout Germany and Austria. Tucker and I adapted some of their suggestions to our own travel itinerary and off we went. (Psst…I did another post about visiting Germany here…check it out!)

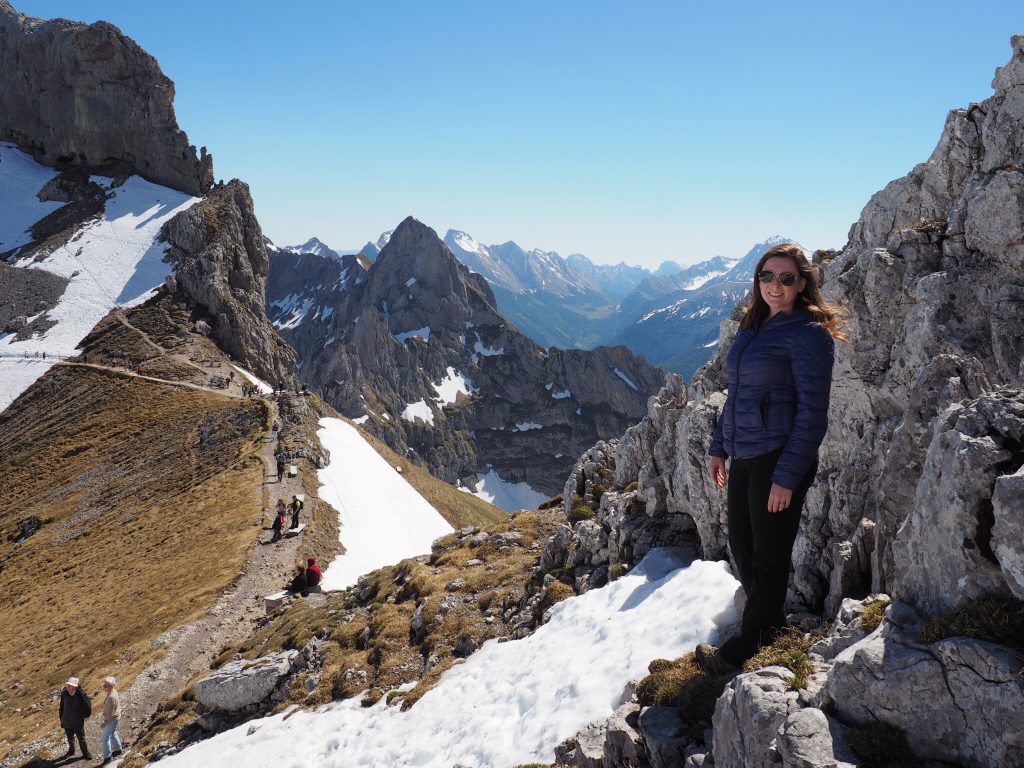
By far the most stunning part of the trip was our visit to the Karwendelbahn. We took a cable car up to an elevation of over 7,300 feet and hiked along the (snowy and icy and very slippery) ridge of the mountain. The views were spectacular.

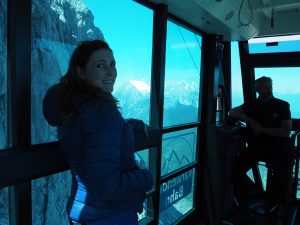
Caitlin in a cable car.
The little blue cable car that took us up and down the mountain!

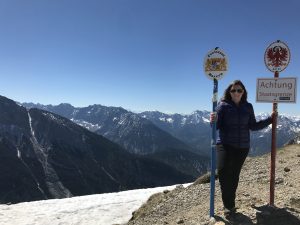
One of the most awesome things about being on the top of that mountain was that we had views of the Alps in four different countries (Germany, Austria, Italy, and Switzerland) as we overlooked the mountain ranges in the distance. As we hiked along the mountain top, we actually crossed the German/Austrian border!

Caitlin standing between sign posts indicating the German/Austrian border.
Signage indicating the German/Austrian border.

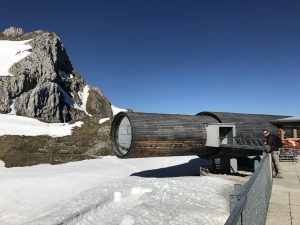
On the other side of the mountain there is a giant telescope that you can take a peek through, which gives you views of the valley below. Inside the telescope building there is also an exhibit about the unique natural habitat that exists at 7,300 feet elevation.

Giant telescope on top of the mountain.
Check out that telescope!
Caitlin standing at the edge of a mountain overlooking Mittenwald.
The view of Mittenwald from the telescope building.
What better way to soak in this spectacular view than with a beer in hand?

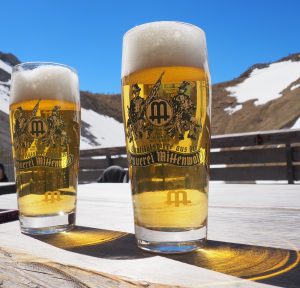
Not just any beer, either. A local brew made right down the mountain in a town called Mittenwald. It was one of those beers that you just don’t want to finish because the experience of drinking it on the top of the Alps is so darn cool.

Two glasses of beer with mountains in the background.
Our Mittenwald Lagers on the mountain top. AKA the most epic beers we ever drank.
If you find yourself traveling through Bavaria, set aside some time to visit the Karwendelbahn.

We spent a couple of hours up at the top of the mountain, but it felt like we could have spent all day there. If you are looking for a longer experience at the Karwendelbahn, consider taking the cable car up the mountain in the morning, and hiking back down to the base. That’s what I would do next time around!

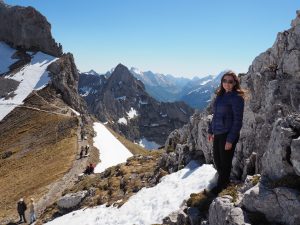
Caitlin standing on the top of the mountain peak.
There was still snow on top of the mountains in late May, and trying to hike along the top of the range made for a very slippery experience!

Where’s the most epic place you’ve enjoyed a beer? Let me know in the comments below!

Where Does Your Food Come From? Food System Facts

I recently bought a deep freezer for my apartment. It lives in our guest room along with Tucker’s surf board and tool boxes (#weneedagarage). Buying a deep freezer for a tiny apartment sounds excessive, I know. But it was for good reason.

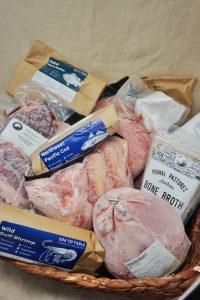
An assortment of meat and seafood in a basket.
Some of the many things being stored in my freezer!

Over the course of the past several months, I’ve read a lot and watched a lot of documentaries about our food system in the US. And with each new piece of information I gather, the more skeptical I become about the food I’m eating. The lack of transparency in our food system is nothing short of a crisis, and I’ve decided to change the way I eat as a result.

EatWild logo.

I stumbled upon a website called Eat Wild a couple months ago, which was exactly what I needed as I figured out next steps in making this change.

Eat Wild’s mission is to inform consumers about the importance of eating nutritious, unadulterated meats (and produce), free of hormones, antibiotics, unhealthy diets, and gruesome living conditions. (Note: If you haven’t educated yourself about the “standards” of raising livestock in this country, and the effect it has on the food you eat, you should.)

Eat Wild provides a directory of farmers throughout the US that subscribe to providing consumers with healthy, grass-fed, free-range meats, many of which offer subscription services that will ship the food directly to your door.

Side note: Can you be passionate about supporting local businesses? If so, I am.

This was another major consideration for me as I ventured in the direction of healthier eating. Maybe it’s the wannabe-entrepreneur in me (I’m just waiting for my “ah-ha!” moment, if that’s a thing), but I find it extremely rewarding to be able to support a family business over a big-box store or company.

Eat Wild has identified specific criteria for the farms that are featured in their directory.

The assurance of knowing that each farm I read about met these healthy food standards was encouraging. I spent hours sifting through the farm directory, looking for a farm that met my needs as a consumer.

Here are a few of the criteria that really resonated with me (taken from eatwild.com):

  • Animals are raised in a low-stress, natural environment and treated humanely from birth to market.
  • Animal grazing patterns are managed to enhance the growth of the pasture, the health of the land, and the nutritional value of products, taking into account the specific soil conditions, vegetation, altitude, growing season, and temperature range of our climate.
  • When high-quality pasture is not available, beef and other ruminants (goats, sheep, bison, deer) are fed stored grasses, which can include hay, haylage, and grass silage. They are not fed grain, soy, corn silage, or concentrate.
  • Animals are not treated with hormones.
  • Animals are not treated with routine, low-level antibiotics. Animals that do receive antibiotics due to health problems or injury are removed from the program.
  • Animals are not confined indoors or in areas without pasture except to protect their welfare during brief periods such as prior to and during birthing, or during extreme weather conditions.

If you’re curious about the rest of the Eat Wild criteria, click here to read them all!

My research led me to find that there were several farms that would allow me to purchase meat directly from local farmers in my area.

Honestly, this surprised me a little bit considering I live in the metropolis that is the greater-Los Angeles area. That said, it also showed me that there are no excuses for not subscribing to this healthy lifestyle with all of these options available!

I also expected to have to set aside more of our monthly budget for groceries in order to purchase meat directly from farmers. But, once again, I was surprised to learn that ordering in bulk from these farmers meant I wouldn’t be spending much more than my normal grocery bill. Another reassurance for sure!
Primal Pastures logo.

The farm I ended up settling on for my meat is called Primal Pastures.

They are based in Temecula, California (fun fact: that’s where Tucker and I got married!), and their box shipments offer a variety of meats in them (which was my personal preference). I appreciated the story of how the founders got into the farming business, and the emphasis on sustainability and responsible farming. For paleo diet fans out there, all of the Primal Pastures meat is paleo-friendly. I ordered the “Cowboy Stash” variety box from them, and here’s what I got in my first shipment:

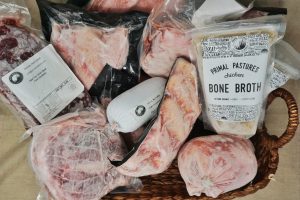
Several frozen meats in a basket.
Meats on meats on meats!
  • 1 whole chicken
  • 2 packages of chicken bone broth
  • 1 package of chicken thighs
  • 2 packages of ground white meat chicken
  • 1 package of boneless skinless chicken breast
  • 2 packages of chicken drumsticks
  • 1 (large) package of chicken wings
  • 1 package of ground beef
  • 1 top sirloin steak
  • 1 pork leg roast
  • 1 pork shoulder
  • 1 large jar of honey from the farm (and it is delicious!)
  • 2 cans of wild caught tuna

Altogether, the box weighed about 22 pounds.


Sea To Table logo.

Now, as much as I love cooking with meat, I’m also a big seafood fan.

I did some extra digging on my own to find a sustainable, healthy seafood company that would allow the same health benefits that I found with Primal Pastures. Sea to Table was the answer I was looking for. All of their fish is wild caught, traceable, domestic, and sustainable, and is never pumped with hormones or antibiotics. I purchased a box of seafood to round out my stash of protein for the next several weeks. Here’s what came in my first shipment:

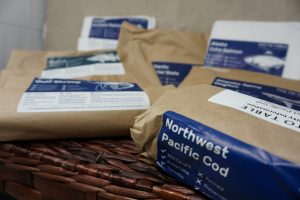
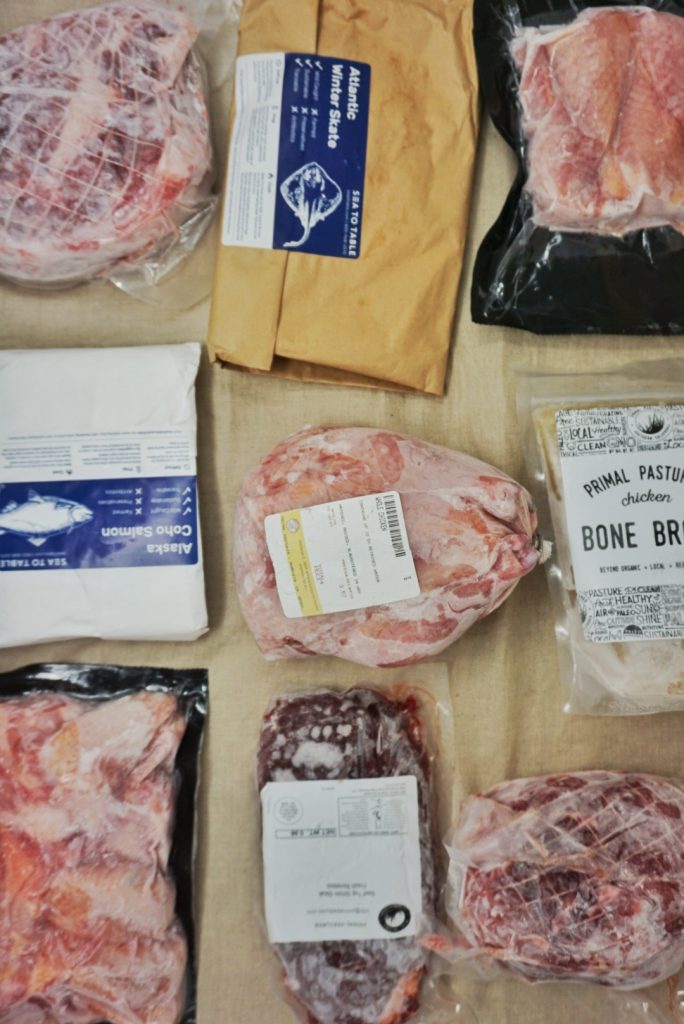
Packages of seafood.
I love the packaging on these…it tells you the best ways to store and defrost your fish!
  • 2 portions of Alaska Coho Salmon
  • 2 portions of Alaska Sockeye Salmon
  • 2 portions of Gulf of Maine Redfish
  • 2 portions of Atlantic Winter Skate
  • 2 portions of Atlantic Spiny Dogfish
  • 2 portions of Northwest Pacific Cod
  • 2 portions of Wild Gulf Shrimp
So, now you understand why I bought a deep freezer.

I’m looking forward to the challenge of developing recipes with each of these different foods, and hopefully reaping the health benefits in the process. My next step is to identify how I can be purchasing more sustainable produce to round out this newfound passion for healthy eating. Let me know your suggestions in the comments!

If this post made you think twice about the food you’re consuming, I encourage you to dig a little deeper and learn about the flaws within our food system. If you’re inspired to change your eating habits altogether, look into how you can support local farmers or fishermen in your area, and ideally receive better quality food as a result. It is easier than you think, and extremely rewarding to be able to give back to your community. I’ve linked the Eat Wild directory below to give you a head start in finding farms in your area.

Eat Wild Directory

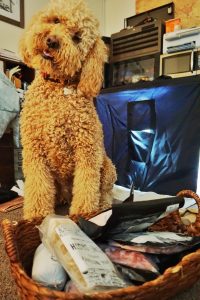
Goldendoodle curious about the meat.
Oakley couldn’t figure out why I wouldn’t let him eat the meat. He tried several times…
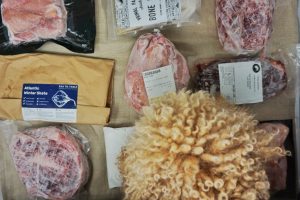
A dog's furry head with meat in the background.
And this was more or less how the photoshoot went. Several photographs were interrupted by a furry head.

Have you already made the switch to healthy eating? Thinking of making the switch for the first time? Let me know in the comments below!


Happy Healthy Eating!

The Truth About Canned Wine: My Canned Wine Review

What’s the first thing you think of when you see canned wine? Cheap wine? Poor tasting wine? Overly sweet white wines that really shouldn’t be called wine at all? Maybe. But the canned wine industry is booming, and if you haven’t seen canned wine on your grocery store shelves yet, you will soon.

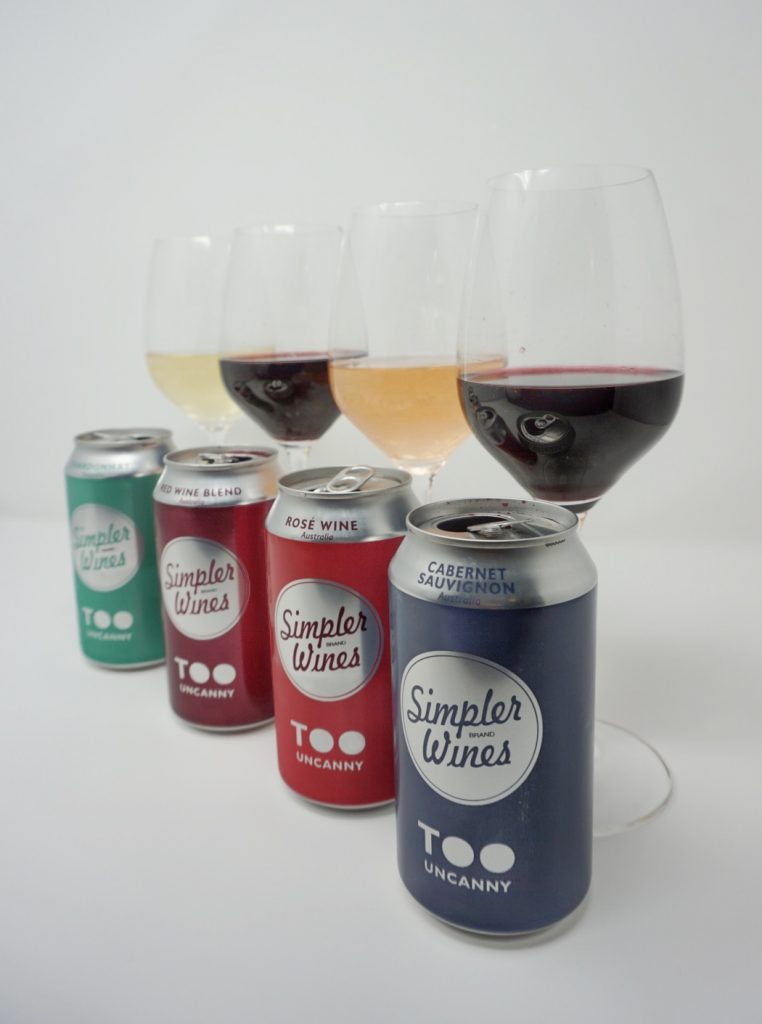
Four cans of wine with four glasses of wine in the background.
The tasting lineup from Simpler Wines.

I was shopping at Trader Joe’s last week and noticed four varieties of canned wine on display. Four! Two reds, a white, and a rose. I hadn’t tried canned wine up to this point, but after seeing four varieties I decided this was the time to do it. The brand I found was Trader Joe’s’ brand called “Simpler Wines”. It is a budget-friendly wine (only a couple bucks a can), which could be good or really bad. I took a gamble on it considering many of the Trader Joe’s labels on bottled wine are actually pretty good. I was eager to see if the canned wine would surprise me. Commence my first canned wine review.

Before I get to the taste, there are some definite benefits to canned wine that need to be acknowledged.

Benefit #1:

First, for people like me who love to travel and explore the outdoors, preferably with a beverage in hand, we have thus far been limited to beer. Canned beer to be exact. And don’t get me wrong, I love craft beer. But sometimes on a cold night camping, reaching into an icy cooler to get an even icier beer just sounds like too much to beer…I mean, bear. Why not grab a nice can of red wine instead?

Benefit #2:

Canned wine is also much more incognito than bottled wine. I’m not endorsing bringing alcohol to public places where it isn’t allowed. But I’m also not naïve enough to think it doesn’t happen. So at least with canned wine you can be secretive about your illegal activity…I guess?

Benefit #3

Third, the cost is something to be considered. Now, most canned wines don’t appear to be extra-affordable yet. For a 4-pack of name brand canned wine (which, surprisingly, equates to 2 bottles of wine), you’ll often find yourself paying upwards of $30. Depending on your wine budget, this might be more than what you’re willing to spend. That said, if the momentum of the canned wine movement continues as it has thus far, prices may become a bit more competitive in the future. Maybe. Wishful thinking at least.

Benefit #4…I think?

I guess another benefit of drinking wine by the can could be that you’re not forced to drink an entire bottle before the wine goes bad…instead, you only have to drink the equivalent of half of a bottle at a time. I personally don’t relate to this issue very much, but maybe some do?


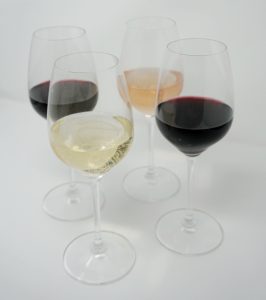
Four glasses of wine: 2 reds, 1 white, and 1 rosé.
It’s wine o’clock!

Commence the taste test.

I tried four varietals from the Trader Joe’s Simpler Wines brand: Chardonnay, Rosé, Red Blend, and Cabernet Sauvignon. All of them are Australian wines. I poured each wine into a glass before tasting because drinking canned wine doesn’t mean you should drink it out of a can.

The Chardonnay was up first, and I was pleasantly surprised.

It was a buttery Chardonnay with slight acidity and a full body of flavor. There was no “oaky” quality to it at all (which I personally love in my Chards, but I can still appreciate a no-oak version when it comes down to it). This Chard didn’t taste like it came from a can at all. Had someone poured me a glass without telling me where it came from, I never would have guessed it came from anywhere other than a bottle. Sip after sip it just became more enjoyable. What a great start to my taste test!

Next up: the Rosé.

This one was a bit underwhelming after the Chardonnay (maybe I tasted them in the wrong order). It was pleasant, fruity, and light, but lacked some body in my opinion. It wasn’t very acidic at all, but also wasn’t overly sweet. This wine seemed like it would be a perfect, inexpensive, summertime sip, especially for Rosé fans out there.

Onto the reds.

First up was the Red Blend.

After a pretty good Chard followed by a decent Rosé, I was hopeful for a good canned red. But, boy, was I disappointed. The Red blend was smooth to taste at least, but the flavor was more or less like cranberry juice. The aroma of the wine smelled like it came from a can, and the aftertaste left me with a metallic taste on my tongue. It also seemed very sweet for a red blend, a typical characteristic of cheap wine. After a couple sips of this (enough to form some tasting notes), I gave this Red Blend a hard pass and moved on to my final tasting.

Last was the Cabernet Sauvignon.

It couldn’t get any worse, right? Wrong. This tasting went from bad to worse when I took the first sip of the Cab. It was not nearly as sweet as the Red Blend, which just made it taste more like an aluminum can. I couldn’t even come up with any notes to describe the flavor (or lack thereof) …it was just plain bad. The smell of the wine was purely metallic, too. Needless to say, this wine (as well as the Red Blend) went straight down the drain.

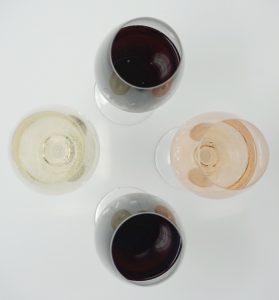
Birds eye view of four wine glasses.
Life is too short to drink bad wine…so stick to bottles (of red) for now.

So, would I buy this brand of canned wine again?

Maybe the Chardonnay or the Rosé, but I would never try either of the reds again. I was disappointed by this result because I was really hoping to find a good can of red wine. Maybe there is a reason most canned wine on the market so far is of the white, rosé, or sparkling wine variety.

Part two of this canned wine review will likely be the comparison between a bottle and a can of the same wine to really get a feel for how the can may or may not affect the flavor. Or, maybe I’ll just try different brands of canned wines to see if they can redeem themselves in my book! But for now, please excuse me while I work to restore my palate with a glass red wine…from a bottle.

Have you ever tried canned wine? What’s your canned wine review? Let me know in the comments below!

My Sony a6000 Camera: Why I Chose a Mirrorless

Today is an exciting day (for me, anyway). After lots of research, deliberation, and (not so) patiently waiting, my new Sony a6000 camera has finally arrived!
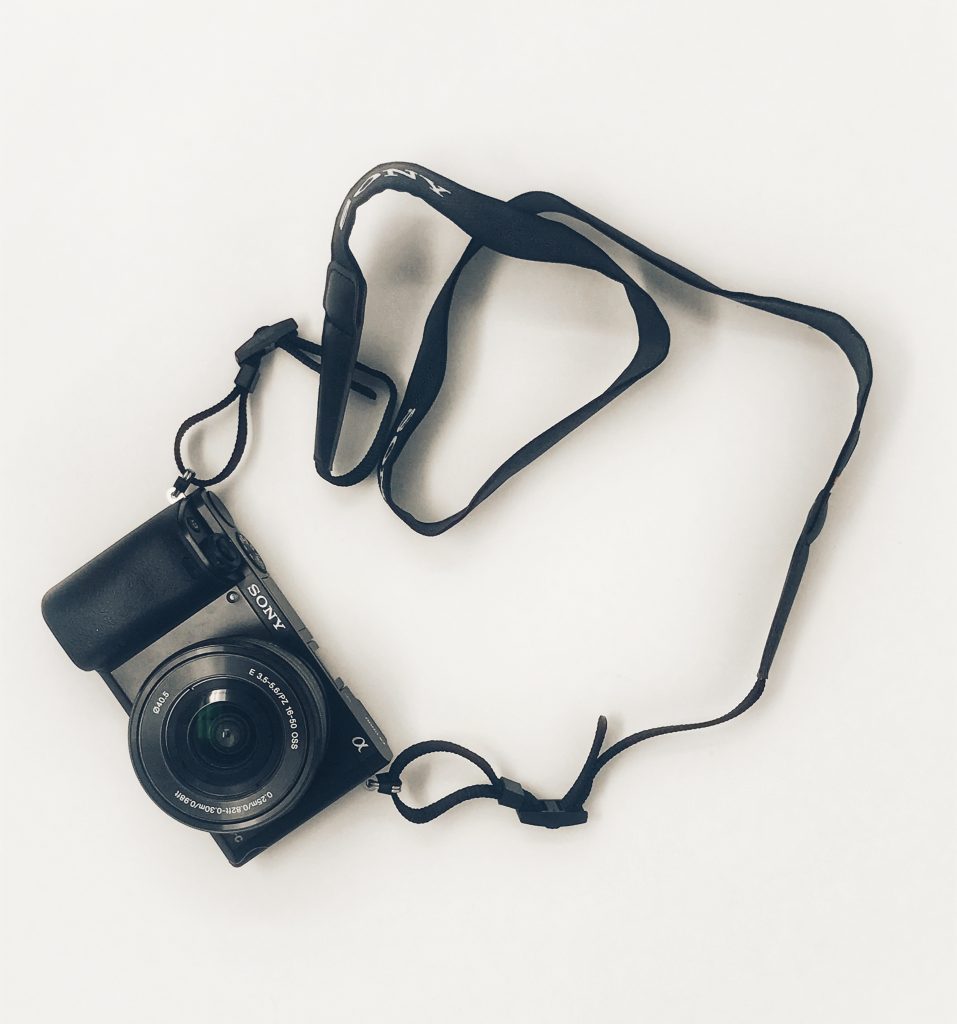
A Sony a6000 camera.
Isn’t it pretty?!

The pictures I’ve posted on the blog so far were either taken with my iPhone, or with Tucker’s Olympus OM-D EM-10 mirrorless camera. Some photos I’ve used were taken my Tucker himself (he’s a great photographer). I really like the Olympus, but more and more I was wishing I had my own camera to capture moments on trips or recipes in the kitchen.

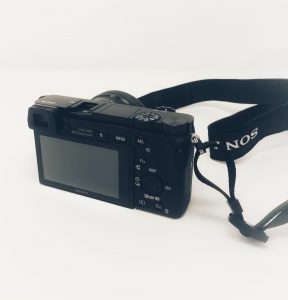
A Sony a6000 camera.
Good looking…even from the back!
Extensive research and recommendations from my photographer-father led me to the Sony a6000. Here are some of the reasons I chose this camera:
  • Size was a major factor in determining which camera to choose, since I will be using it while traveling more often than not. Mirrorless cameras are significantly lighter and smaller than a traditional DSLR camera, but offer the same professional quality that larger cameras have. I considered a few DSLRs in my selection process, but after playing around with them at the store, I knew they would eventually be annoying to carry around on long trips.
  • The a6000 felt like a perfect “next step” for someone (me) just getting into the photography scene. The body of the camera offered all the bells and whistles I was looking for, and the software was easy to understand. I’m also confident I’ll be able to build a collection of lenses for this camera body moving forward.
  • I didn’t want to spend a fortune on a new camera, but I had saved up for several months and was ready to spend a decent amount on this new equipment. The a6000 was one of the cameras that offered the most bang for my buck, which made it feel like a great financial investment, too.
  • Everything that I heard or read as I was researching for this purchase pointed to the fact that Sony has really stepped up its photography game in recent years. Some claim that Sony even outperforms Canon and Nikon in the mirrorless camera category!
  • I spent quite a bit of time at the store playing around with this camera (and some others) before I committed to buying this one. One of the things I really liked about the Sony a6000 was how intuitive the software was, and how quickly I was able to figure out some of the settings. Now, I’ve still got a long way to go to learn the ins and outs of this camera, but it felt nice knowing that the interface was easy to understand right off the bat.
A Sony a6000 camera.
“My life is shaped by the urgent need to wander and observe, and my camera is my passport.” — Steve McCurry

Now, excuse me while I go learn how to use this camera instead of just writing about it!

What’s your go-to camera? Let me know in the comments below!

I Tried Wine Awesomeness and Here’s What I Thought

A few months ago an email came through offering a great deal for a wine subscription box from Wine Awesomeness. I clicked on it because the name of the company sounded cool. When I dug a little deeper, it seemed like I really was getting a good deal on the wine (the deal was for 50% off my first box, meaning I only paid $40 for the six bottles…the bottles are advertised to cost $17-22 a piece), so I subscribed and had a box sent. I’m glad I did!

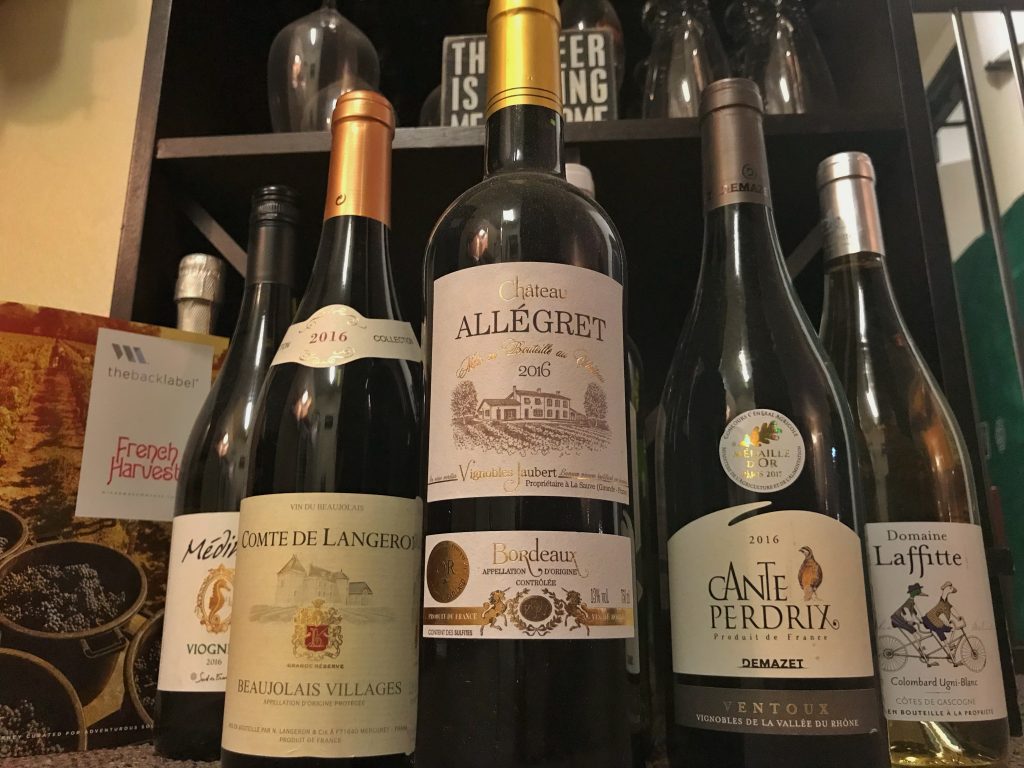
Six bottles of wine and an educational booklet.
The wine lineup from the French Harvest box.

A few days later the “French Harvest” box arrived at my door. It was filled with six French wines, three white and three red. I hadn’t heard of most of the varietals, so I really wasn’t sure what to expect. I gave each wine a try and not a single bottle disappointed. I’ve put together a little synopsis of each bottle below…take a look!

Sidenote: Each box you get has a different theme, and the wines are curated from around the world. It is a great way to get a peek into international wine cultures, tastes, and recipes!

The whites:

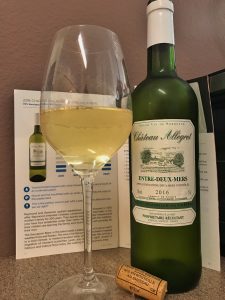
2016 Chateau Allegret wine.
2016 Chateau Allegret, Entre-Deux-Mers (70% Sauvignon Blanc, 30% Semillon). This wine was bright and fruity, but not overpoweringly sweet. I paired this with my Mediterranean Farro “Salad” (check out my recipe here), which made for perfect combination of fresh, vibrant flavors!
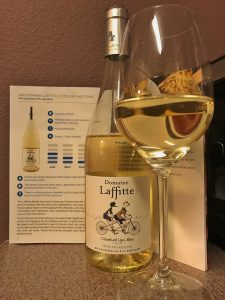
2016 Domaine Laffitte wine.
2016 Domaine Laffitte, Cotes de Gascogne (70% Columbard, 30% Ugni-Blanc). This wine was light, citrusy, and slightly effervescent. It is tart with higher acidity than the other white wines, but was also one of the most refreshing! The recommended pairing was with shellfish, which I think is perfect!
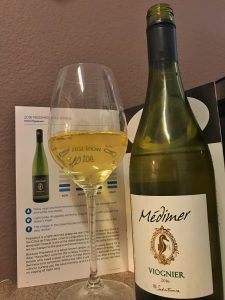
2016 Medimer, Voignier wine
2016 Medimer, Voignier (100% Voignier). I’ll admit that I was hesitant to try this wine…every Voignier I’ve ever tried has been overly sweet, which isn’t my thing. With this bottle I learned that I hadn’t had any good Voigniers before! This wine was full-bodied and creamy, and showcased hints of Chardonnay qualities (which is my favorite kind of white wine!). Wine Awesomeness claims that a single varietal Voignier is rare for the region that this wine hails from, which is primarily known for its Chardonnays and Savignon Blancs.
The reds:

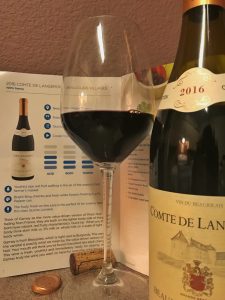
2016 Comte de Langeron, Beaujolais Villages (100% Gamay) wine.
2016 Comte de Langeron, Beaujolais Villages (100% Gamay). My first Gamay…what the heck is it anyway? Wine Awesomeness described it as a “value-driven Pinot Noir”. It is a light red, with similar body to a Pinot Noir, but the Gamay had an almost lemony quality to it. I served my Green Olive Tapenade with this wine (click here for the recipe!), and the salty dish paired well with the acidity of this wine.
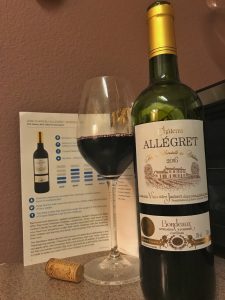
2016 Chateau Allegret, Bordeaux wine.
2016 Chateau Allegret, Bordeaux (40% Merlot, 60% Cabernet Sauvignon). This was definitely the most full-bodied wine of the group. It showcased a nice blend of tannins and fruit flavors, and was a bold wine that could be enjoyed on it’s own or with a heavy meal. This was probably my favorite wine of all!
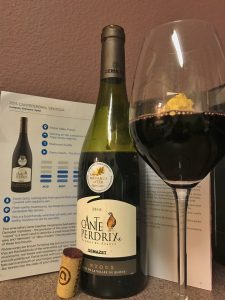
2015 Canteperdrix, Ventoux wine
2015 Canteperdrix, Ventoux (Carignan, Grenache, Syrah). Another full-bodied red to round out the group, this blend was absolutely delicious! It was good right out of the bottle (needed no time to open up), and was both fruity and smooth to taste. Now that I’m remembering this wine, it might have been my favorite of the box…they were all so good I just can’t decide!

thebacklabel

One of my favorite parts about the Wine Awesomeness box was the booklet that came with it, called thebacklabel. The booklet gives lots of information about the flavor profiles of the wine, the history of the grape varietal, specifics about the region, and even a recipe, music, and environment (yes, like where and when it should be consumed!) recommendation for each bottle. All this information is great, but what made the book stand out was that it was written in a relatable, easy-to-understand way. Forget all that snobby wine stuff, this book was written for the average wine-drinker. Finally!

My Final Thoughts

I can say with confidence that Wine Awesomeness wins my vote, especially compared to some other wine subscription boxes I’ve tried. I also learned a lot about the lesser-known grape varietals, and now know that they are often even better than the common varietals we all know of! By ordering through Wine Awesomeness, I also got to support winemakers from around the world rather than buying into the big brands that are too often featured at the market. If you’re looking for a wine tasting experience at home that is affordable, relatable, and fun, give this a shot!

So, in conclusion, I learned:
  1. Don’t knock a new varietal til you try it.
  2. Wine not only pairs with food, it also pairs with environments, and music (according to thebacklabel!).
  3. These wines are great, and well worth the box price.

I’m looking forward to getting my next box!

P.S. This is not a sponsored post, and I wasn’t asked to review this service. I am a genuine customer, and just thought I would share my opinion!

What’s your favorite wine subscription box? Let me know in the comments below!