If you’re looking for ways to take your ordinary cheese board to extraordinary this holiday season, I’ve got 4 simple plating tips for you. I was inspired to put together this post after seeing new, creative ways to arrange a cheese board while I was at the Wine Bloggers Conference this month. The Cheese Twins led us through a wine and cheese pairing using Cheeses of Europe, and their presentation (both the PowerPoint and the cheese board!) did not disappoint. Check out my post about them here!
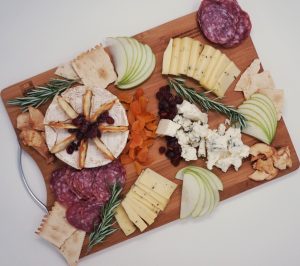
If you follow these four tips, I can guarantee your fromage board will be an eye-catching centerpiece on your table. Not only that, they will also make serving a breeze for your guests! Anything that makes hosting a party easier is a win in my book.
Without further ado, here they are!
-
Pre-portion your cheeses.

The Cheese Twins recommend estimating that each of your guests will consume approximately one ounce of cheese. This seems like a modest estimate to me…but I’ll take their word for it. (I LOVE cheese.) Cut your cheeses ahead of time to ensure that your guests stick to the portions you estimated. Leaving that cheese knife on the board next to a block of cheese can allow your guests to be a little greedier then you may want. It’s also less messy and fuss-free to do the cutting for them!
-
Add dimension.
A flat fromage board is a sad fromage board.

Add some dimension to your platter with both the cheeses and the accompaniments!

One of my favorite ways this was displayed at the Wine Bloggers Conference was with the Camembert, where slices of the round were divided into bite-sized triangles using round crackers (I duplicated this technique on my board!).

Easy to separate, easy to eat, and visually pleasing. Another great example was the Cheeses of Europe flags standing tall in the bleu cheese slices. It adds dimension, can be adapted for any celebration, and you’ve got your serving tool in the cheese before your guests even arrive. Brilliant!
-
Add splashes of color.
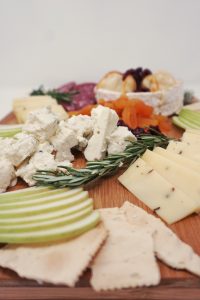
Cheese doesn’t come in a wide variety of colors, nor should it. So, it is up to you and your creative elements to make your board pretty. Add fresh fruit, dried fruit, herbs, and nuts to decorate your fromage board for the occasion. For example, if you’re going for a holiday theme, add some cranberries, pomegranate seeds, rosemary, and cinnamon-spiced pecans. For a summery occasion, display dried apricots, granny smith apples, or even dried coconut to add both flavor and color to the plate.
-
Mix your mediums.
While we all tend to have a favorite type of cheese, you can’t fill your cheese board with just that kind. You need to be aware of the flavors, colors, and textures of your cheeses, and make sure you have a variety available on your plate. As a general rule, aim for a bleu, a soft cheese, and a firm cheese on any fromage board.

For bigger boards, you can start duplicating textures, but make sure you are still adding diversity in flavor or color. A board with Gouda, White Cheddar, and Manchego might taste delicious, but it definitely won’t be visually or texturally diverse. Don’t be afraid to mix it all up, and add accompaniments that compliment at least a couple different cheeses on your plate.
So, there you have it. So simple, but so effective! Do you have other tips to share about how you arrange your cheese board? Let me know in the comments below!
Share this post:
